


Quick Start
Prerequisites
- n8n instance (self-hosted or cloud)
- Supermemory API key (get one here)
- Basic understanding of n8n workflows
Setting Up the HTTP Request Node
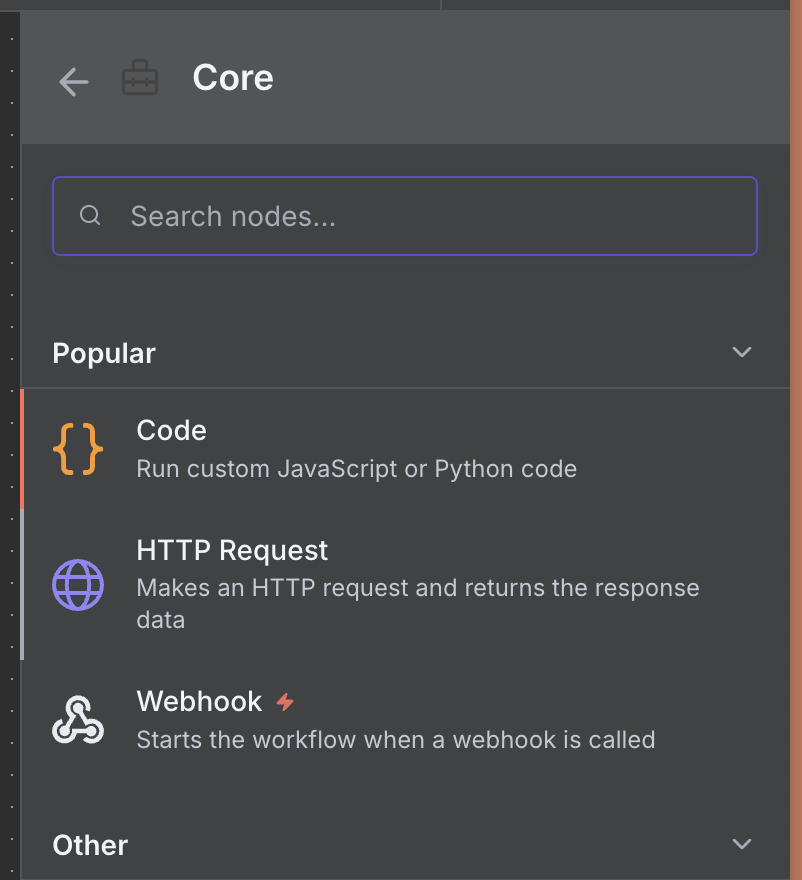
The Supermemory integration in n8n uses the HTTP Request node to interact with the Supermemory API. Here’s how to configure it:- Add an HTTP Request node to your workflow (Core > HTTP Request)
- Set the Method to
POST - Set the URL to the appropriate Supermemory API endpoint:
- Add memory:
https://api.supermemory.ai/v3/documents - Search memories:
https://api.supermemory.ai/v4/search
- Add memory:
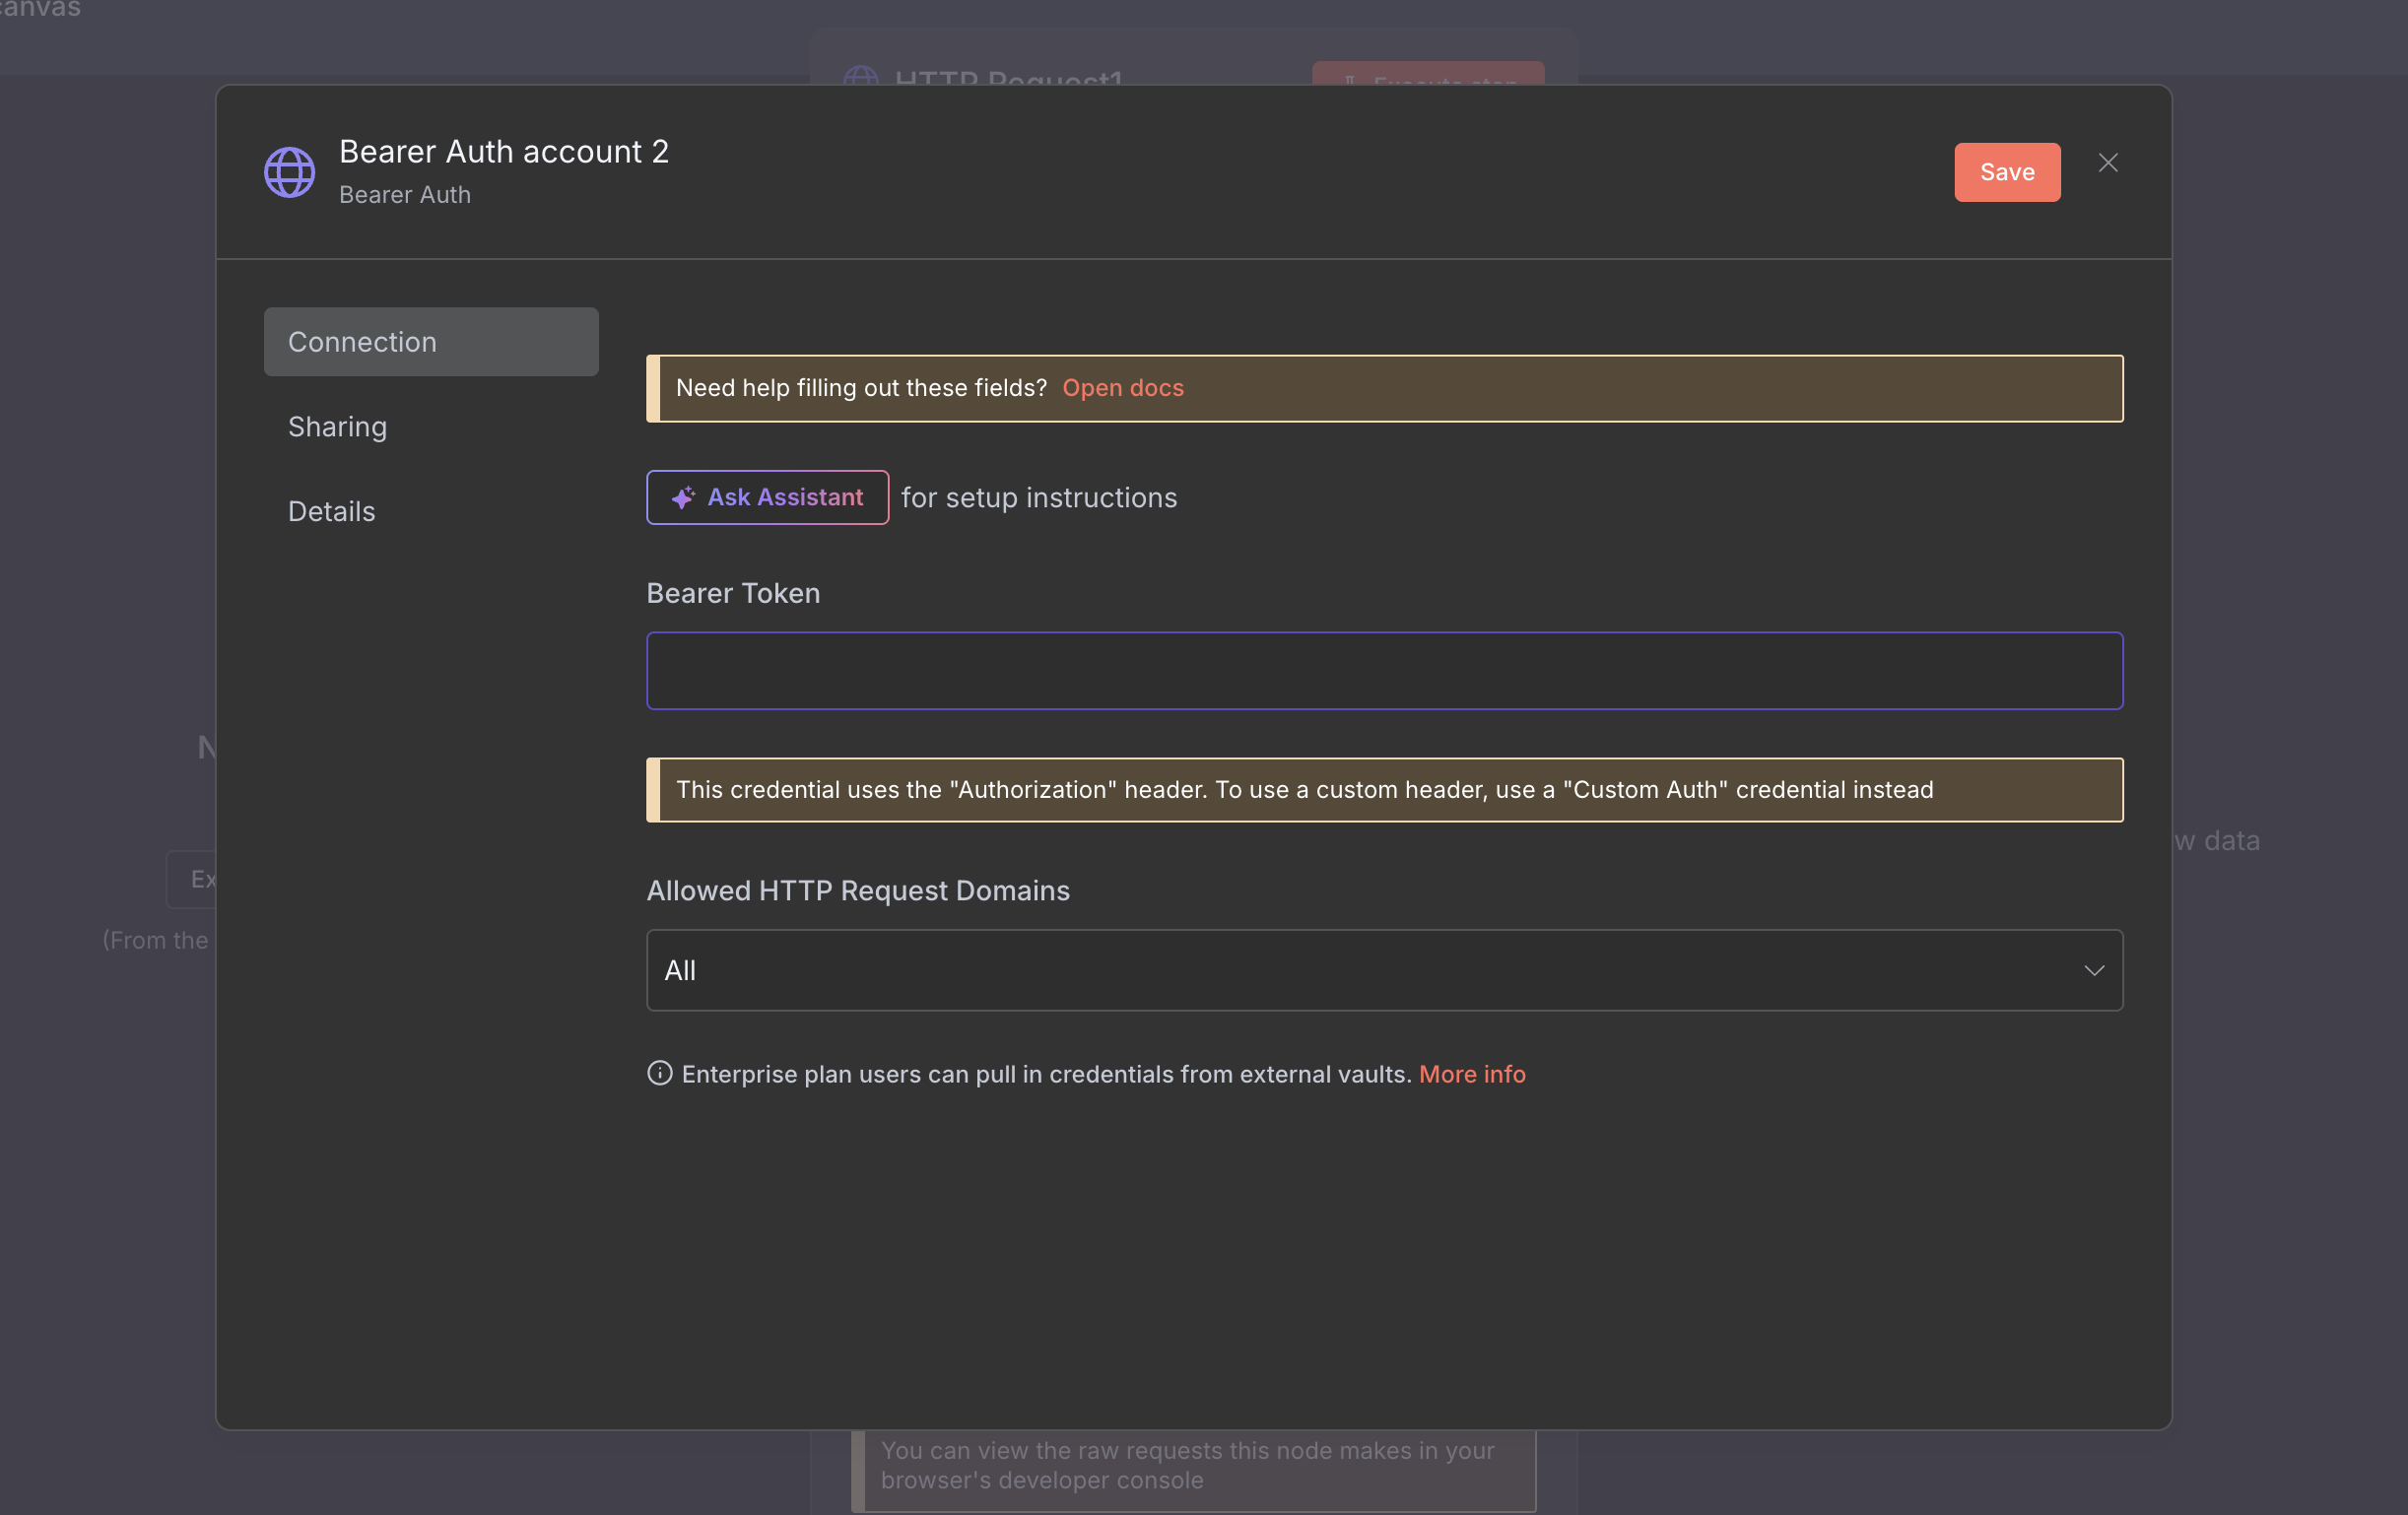
- For authentication, select Generic Credential Type and then Bearer Auth
- Click on Create New Credential and paste the Supermemory API Key in the Bearer Token field.
- Check Send Body and select JSON as the Body Content Type. The fields depend on what API endpoint you’re sending the request to. You can find detailed step-by-step examples below.
Step-by-Step Tutorial
In this tutorial, we’ll create a workflow that automatically adds every email from Gmail to your Supermemory knowledge base. We’ll use the HTTP Request node to send email data to Supermemory’s API, creating a searchable archive of all your communications.Adding Gmail Emails to Supermemory
Follow these steps to build a workflow that captures and stores your Gmail messages:Step 1: Set Up Gmail Trigger
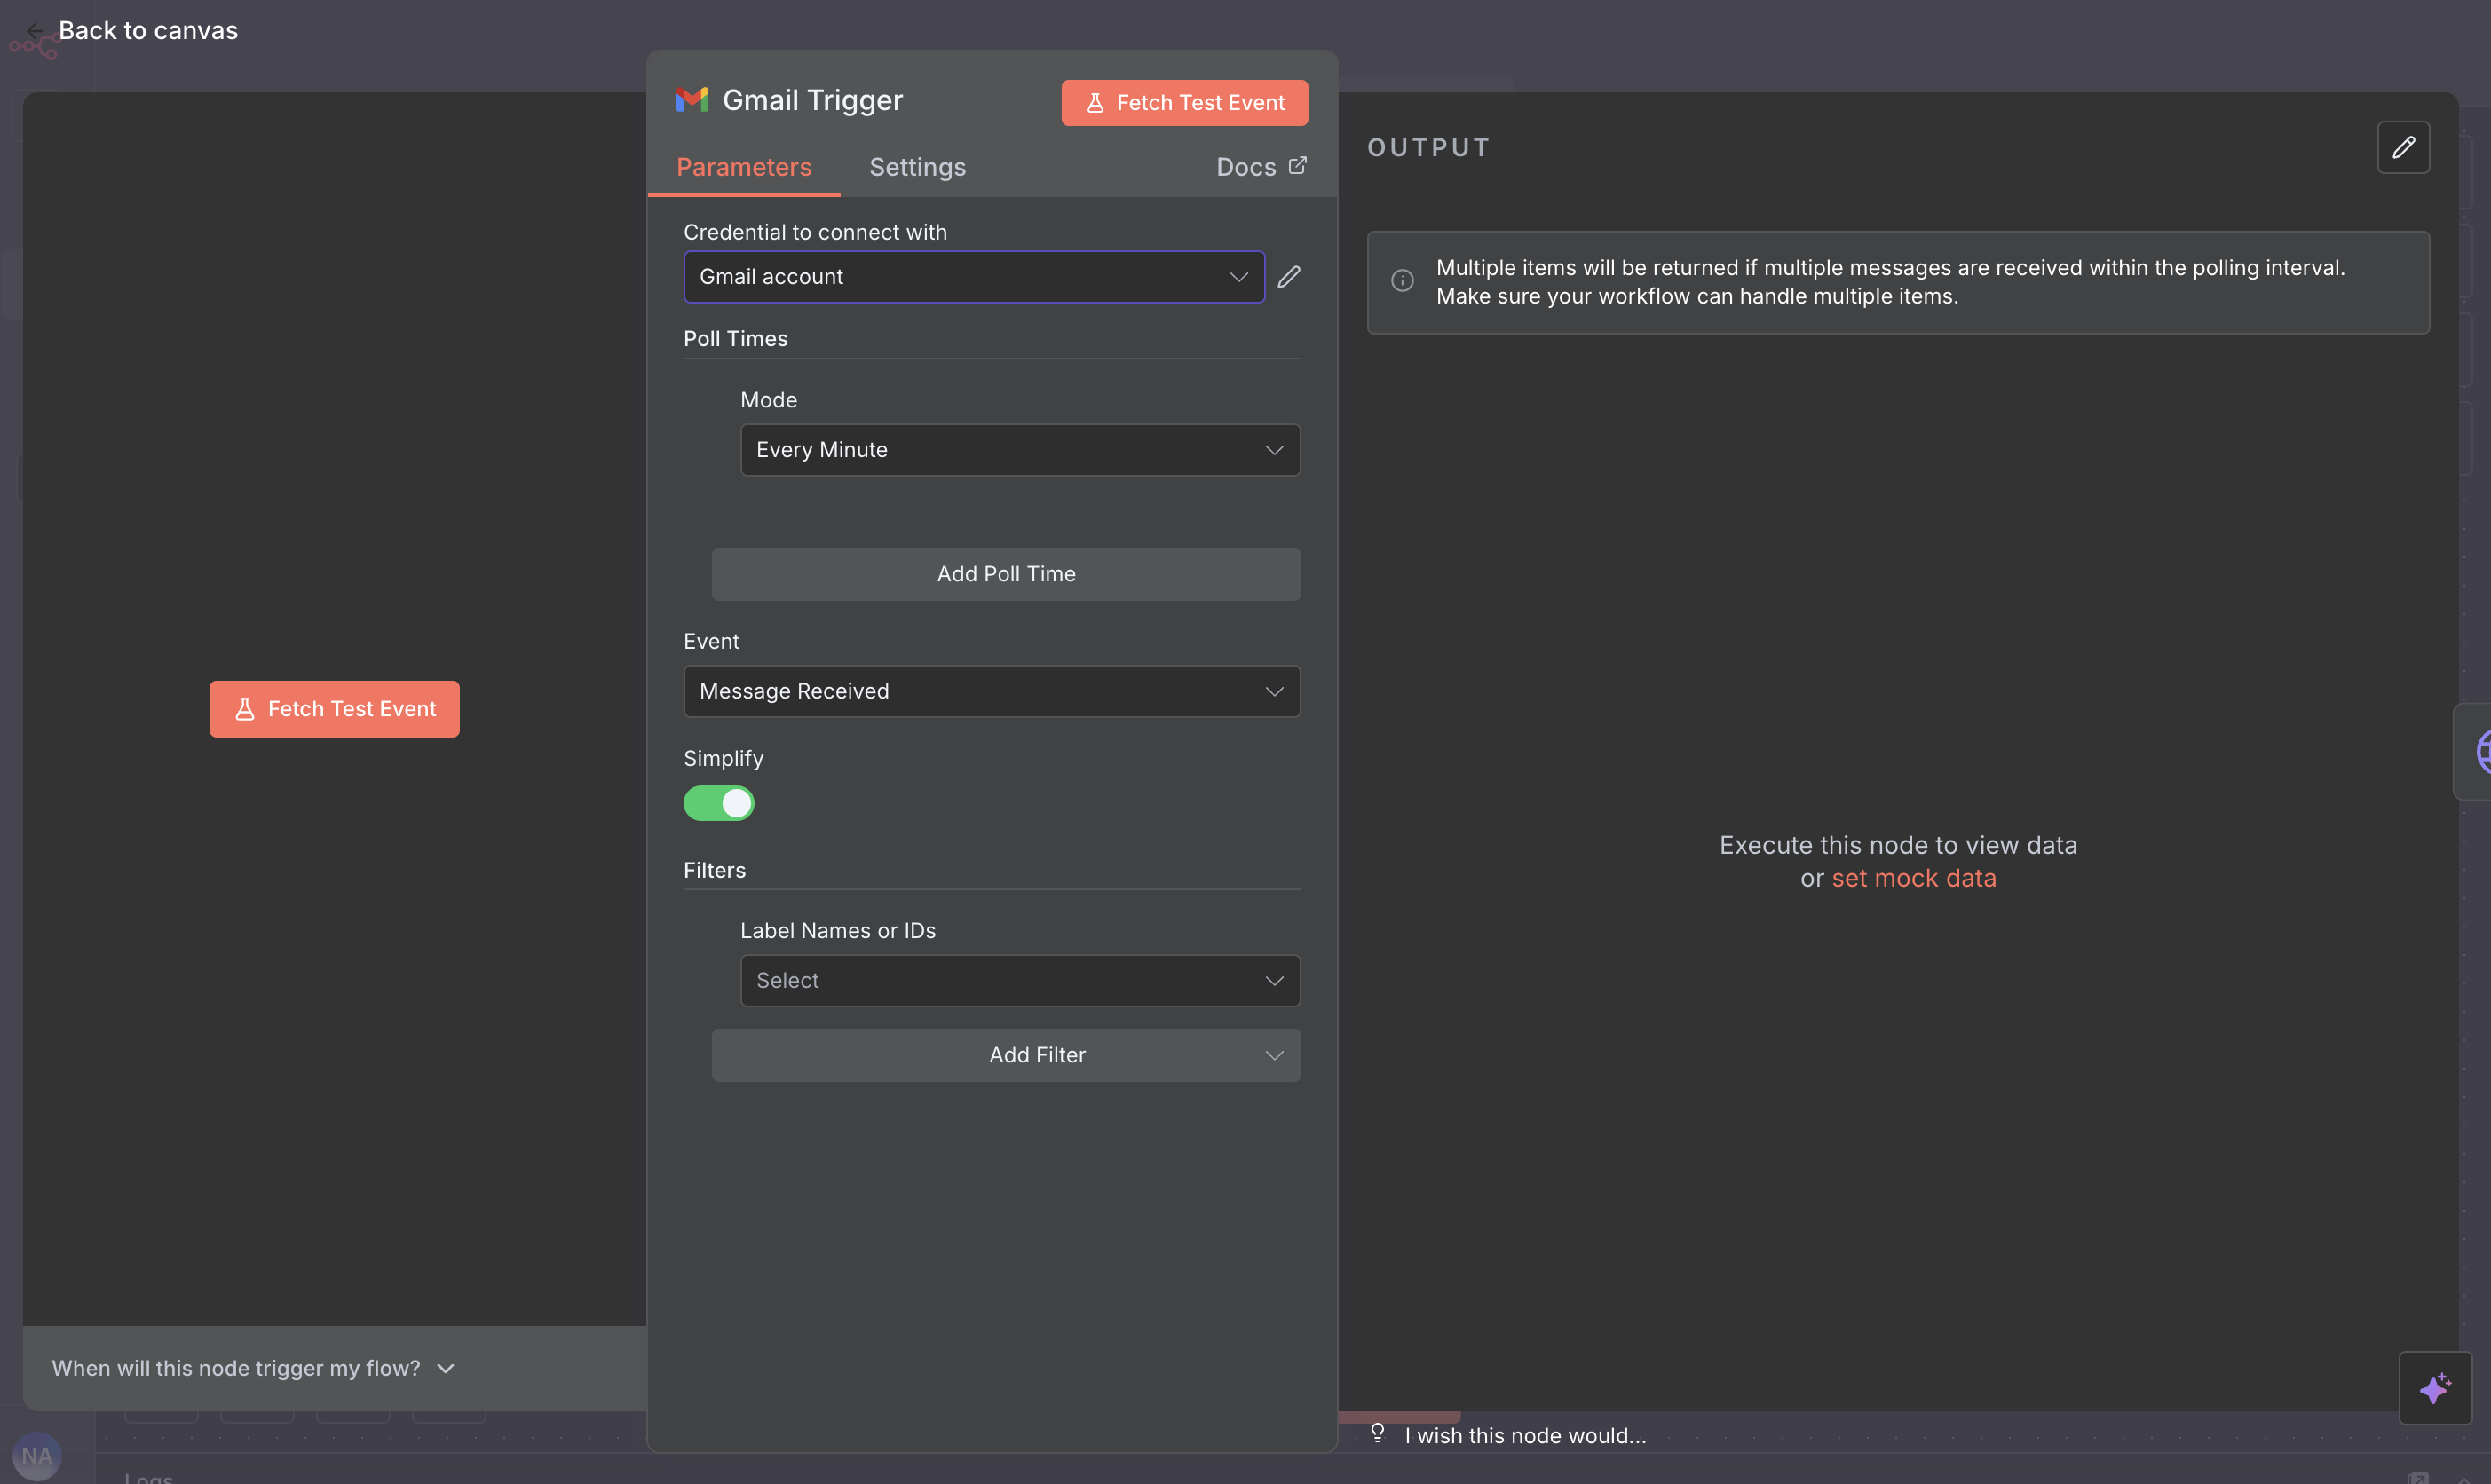
- Add a Gmail Trigger node to your workflow
- Configure your Gmail credentials (OAuth2 recommended)
- Set the trigger to Message Received
- Optional: Add labels or filters to process specific emails only
Step 2: Configure HTTP Request Node
- Add an HTTP Request node after the Gmail Trigger
- Method:
POST - URL:
https://api.supermemory.ai/v3/documents - Select your auth credentials you created with the Supermemory API Key.
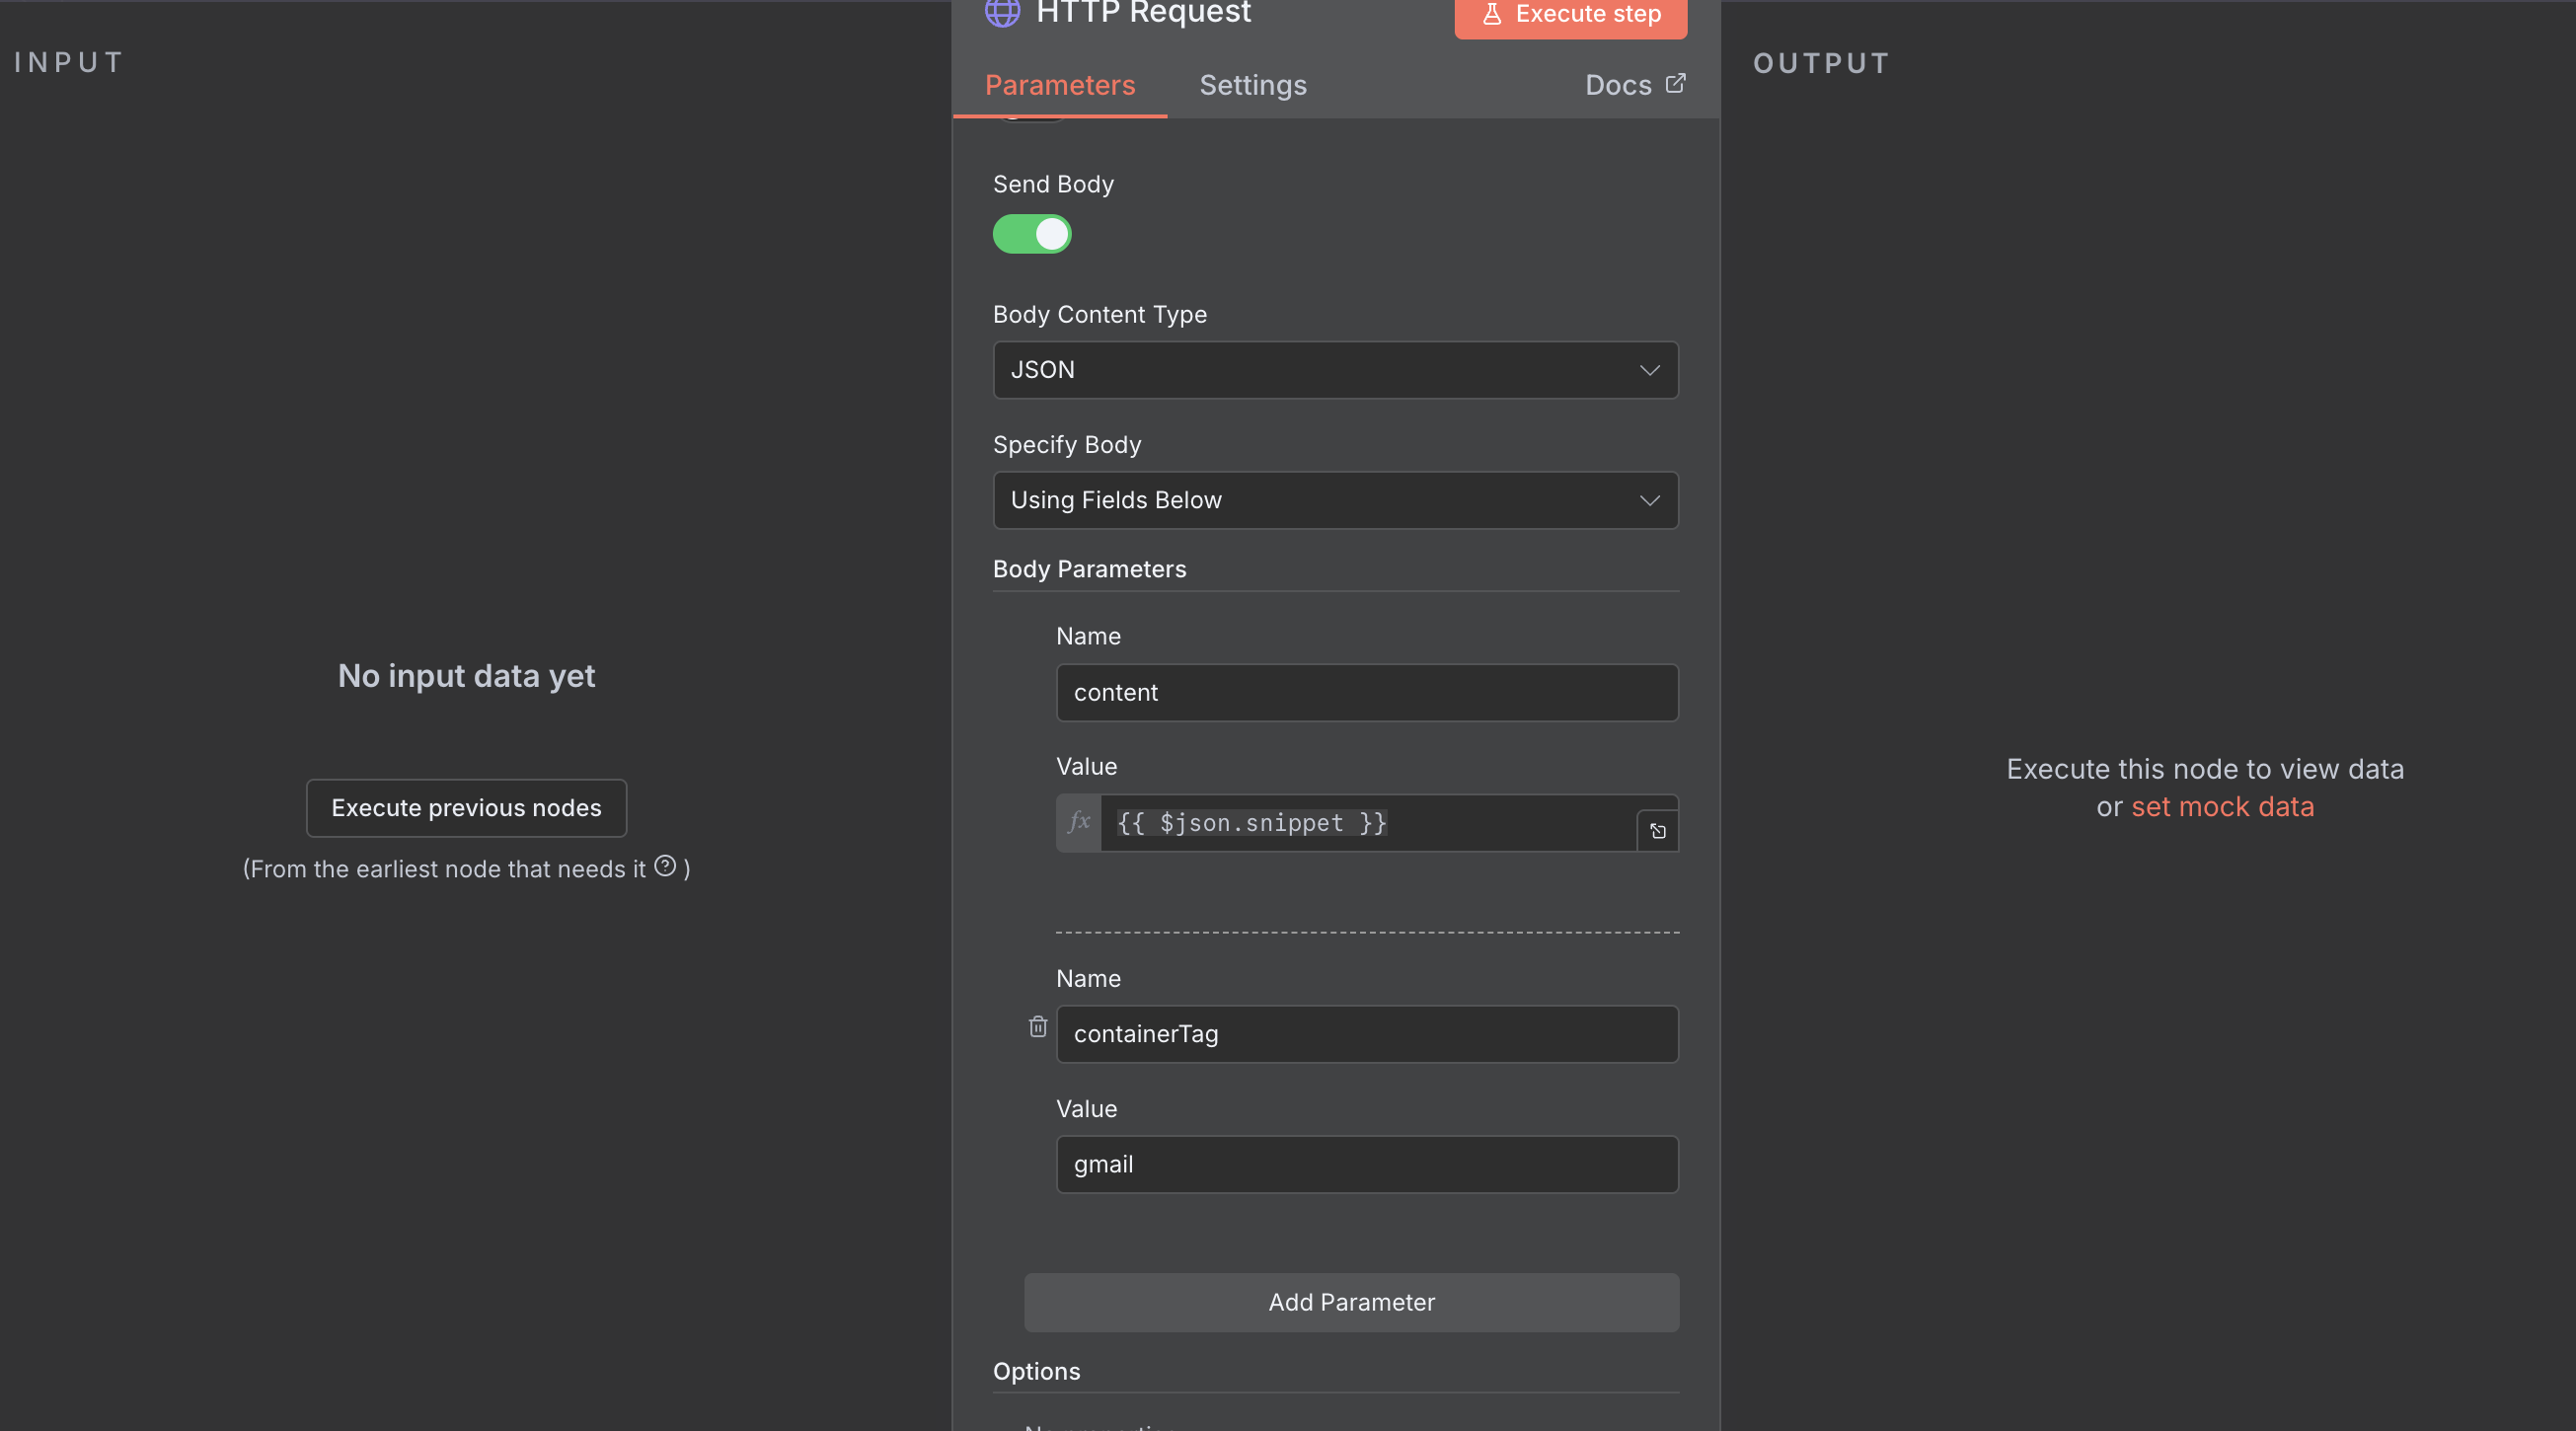
Step 3: Format Email Data for Supermemory
In the HTTP Request node’s Body, select JSON and Using Fields Below And create 2 fields:- name:
content, value:{{ $json.snippet }} - name:
containerTag, value: gmail
Step 4: Handle Attachments (Optional)
If you want to process attachments:- Add a Loop node after the Gmail Trigger
- Loop through
{{$json.attachments}} - Add a Gmail node to download each attachment
- Add another HTTP Request node to store attachment metadata
Step 5: Add Error Handling
- Add an Error Trigger node connected to your workflow
- Configure it to catch errors from the HTTP Request node
- Add a notification node (Email, Slack, etc.) to alert you of failures
- Optional: Add a Wait node with retry logic
Step 6: Test Your Workflow
- Activate the workflow in test mode
- Send a test email to your Gmail account
- Check the execution to ensure the email was captured
- Verify in Supermemory that the email appears in search results