claude_desktop_config.json, add the supermemory server, then finish in Connectors. For a one-line CLI install instead, see Setup and Usage.
Config file location: macOS
~/Library/Application Support/Claude/claude_desktop_config.json · Windows %APPDATA%\Claude\claude_desktop_config.jsonStep 1 — Copy the configuration
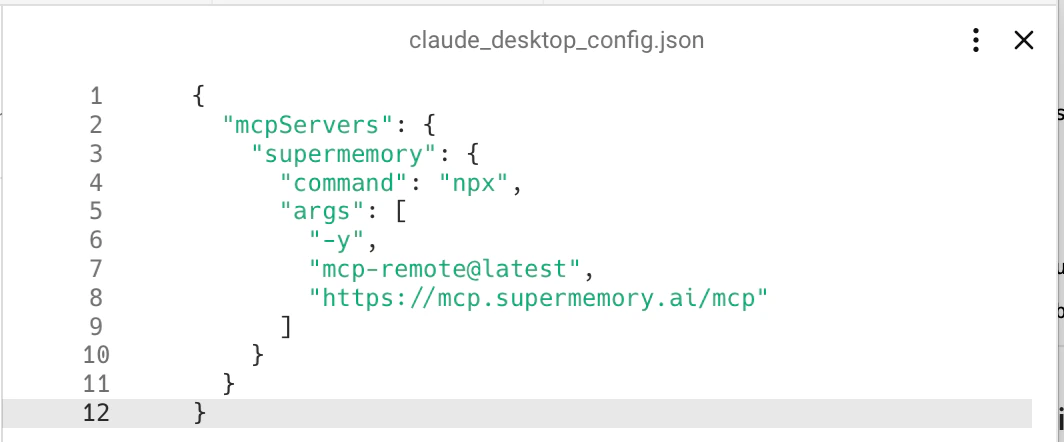
Copy the supermemory block below. You will paste it insidemcpServers in a later step.
Step 2 — Open Developer settings and Edit Config
In Claude Desktop, open Settings → Developer, then click Edit Config.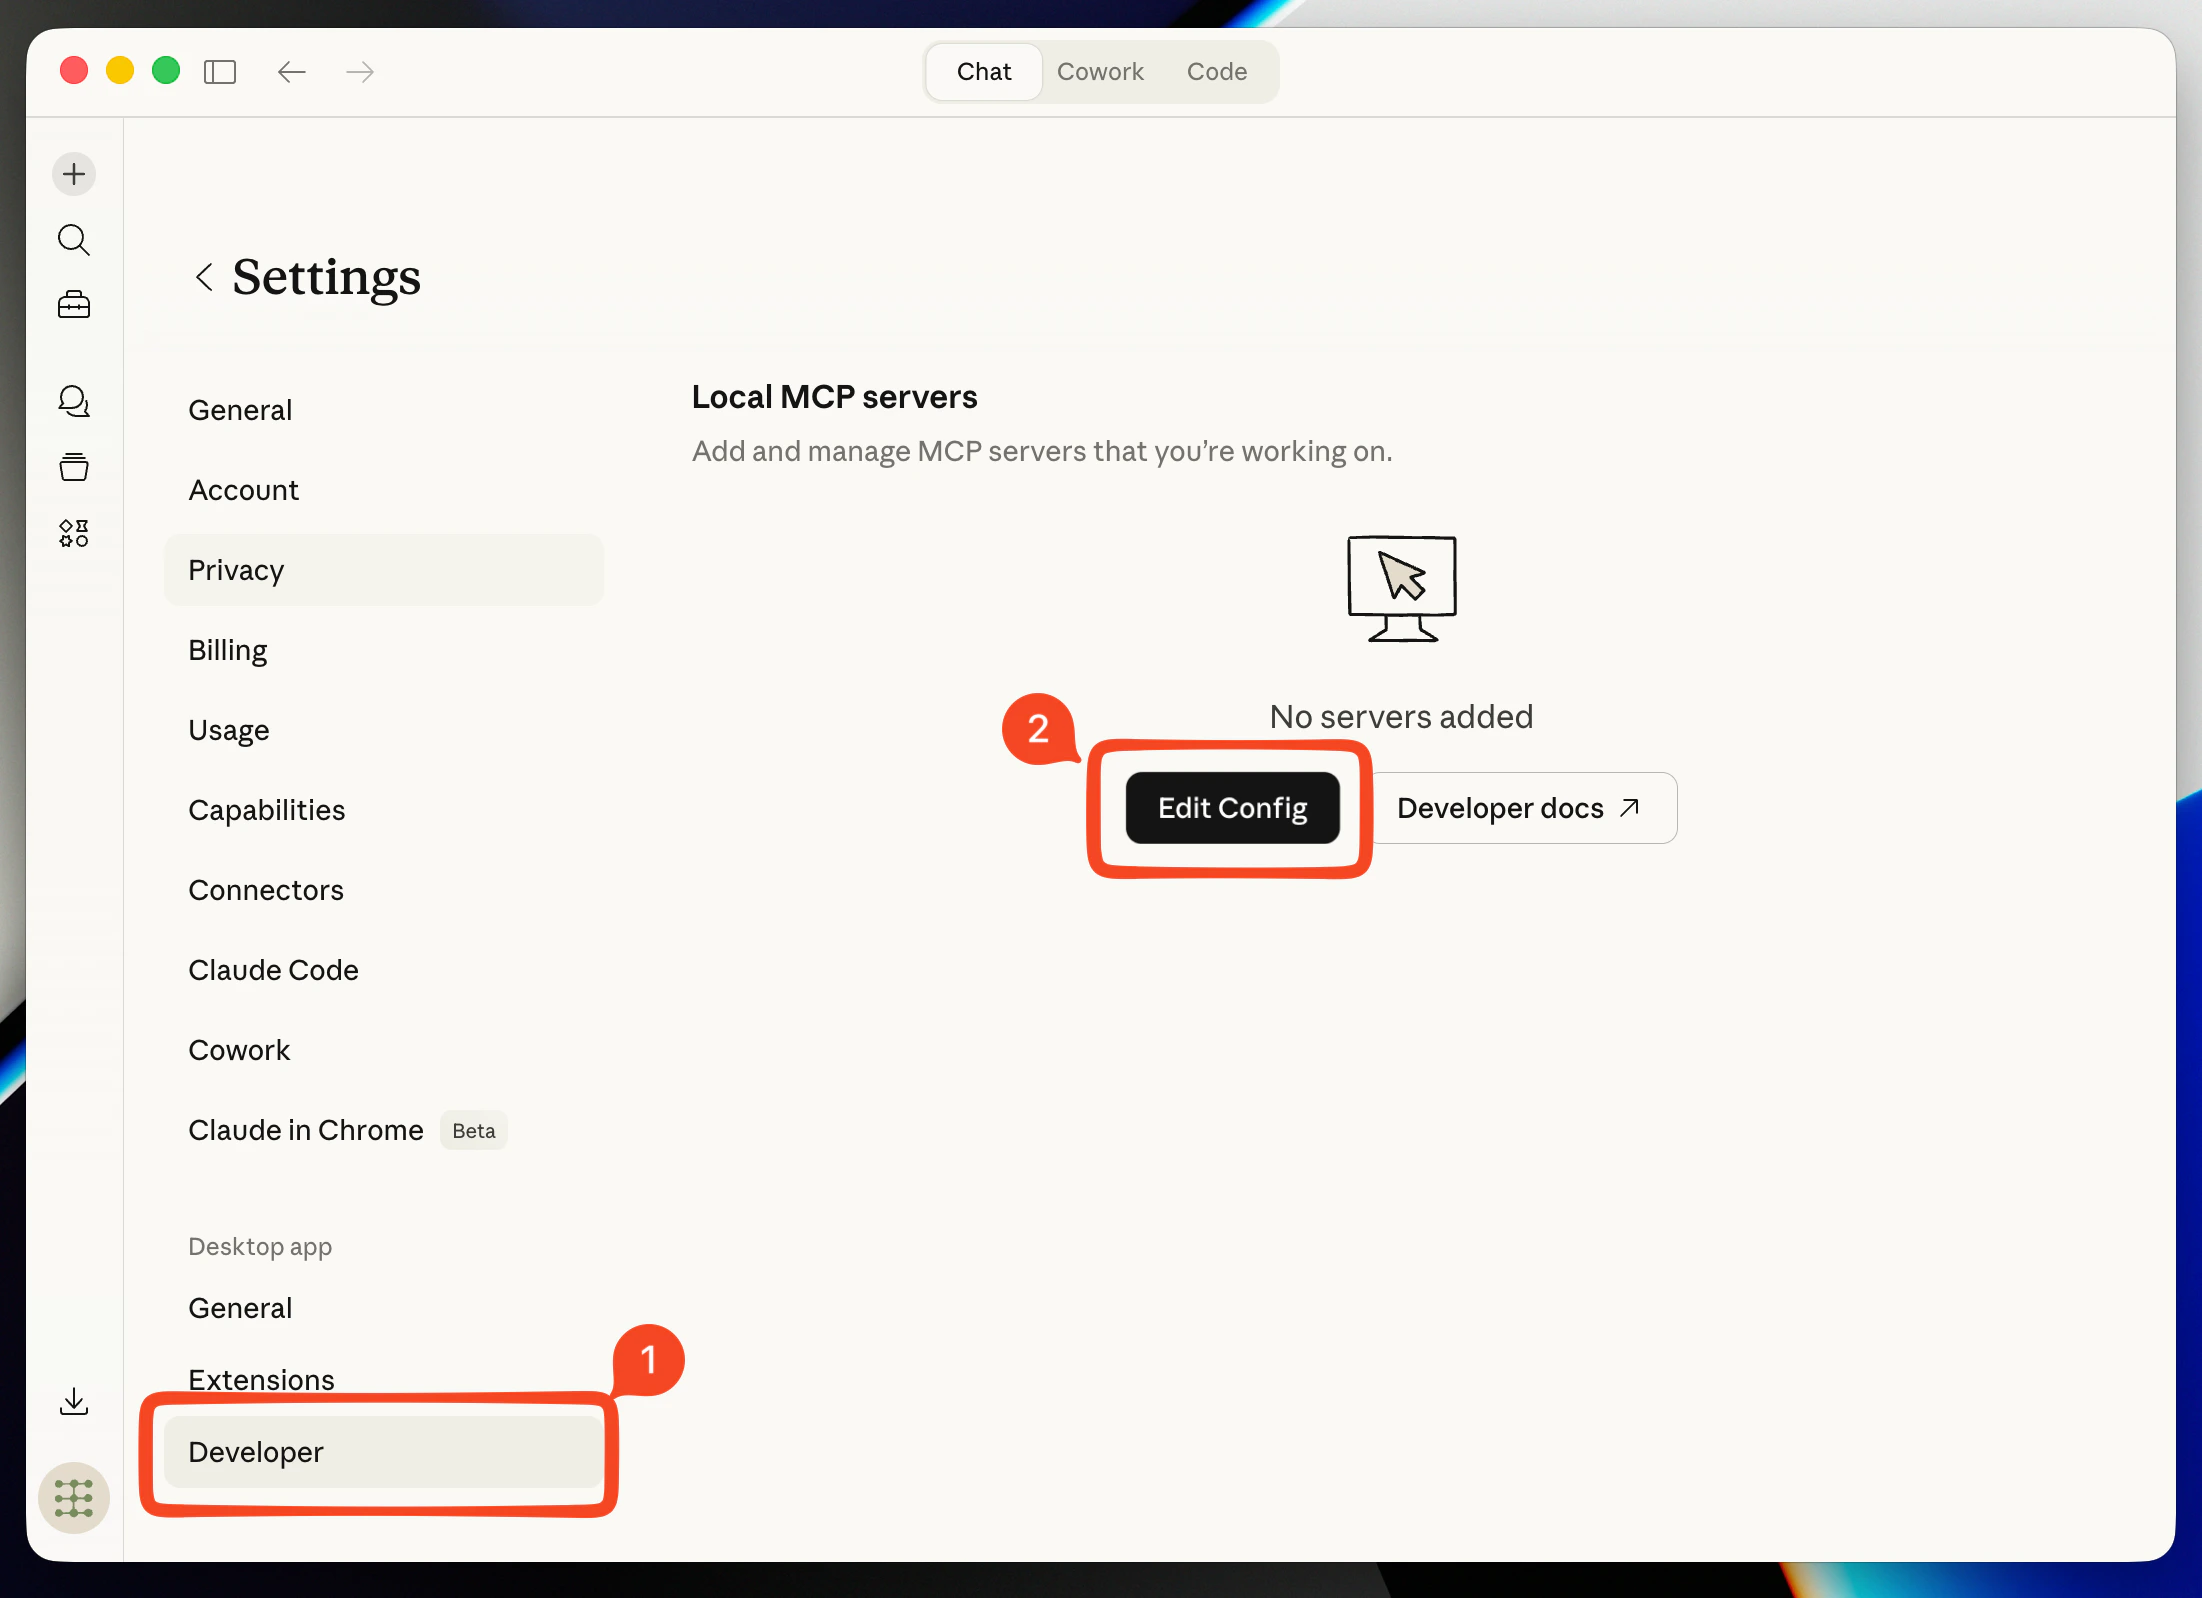
Step 3 — Open claude_desktop_config.json
Whenclaude_desktop_config.json opens in your editor, keep it ready for the next step.

Step 4 — Paste under mcpServers and save
Paste what you copied undermcpServers (merge with existing servers if the file already has some), then save.
Step 5 — Restart and configure in Connectors
Restart Claude Desktop. Open Settings → Connectors, find supermemory, and click Configure.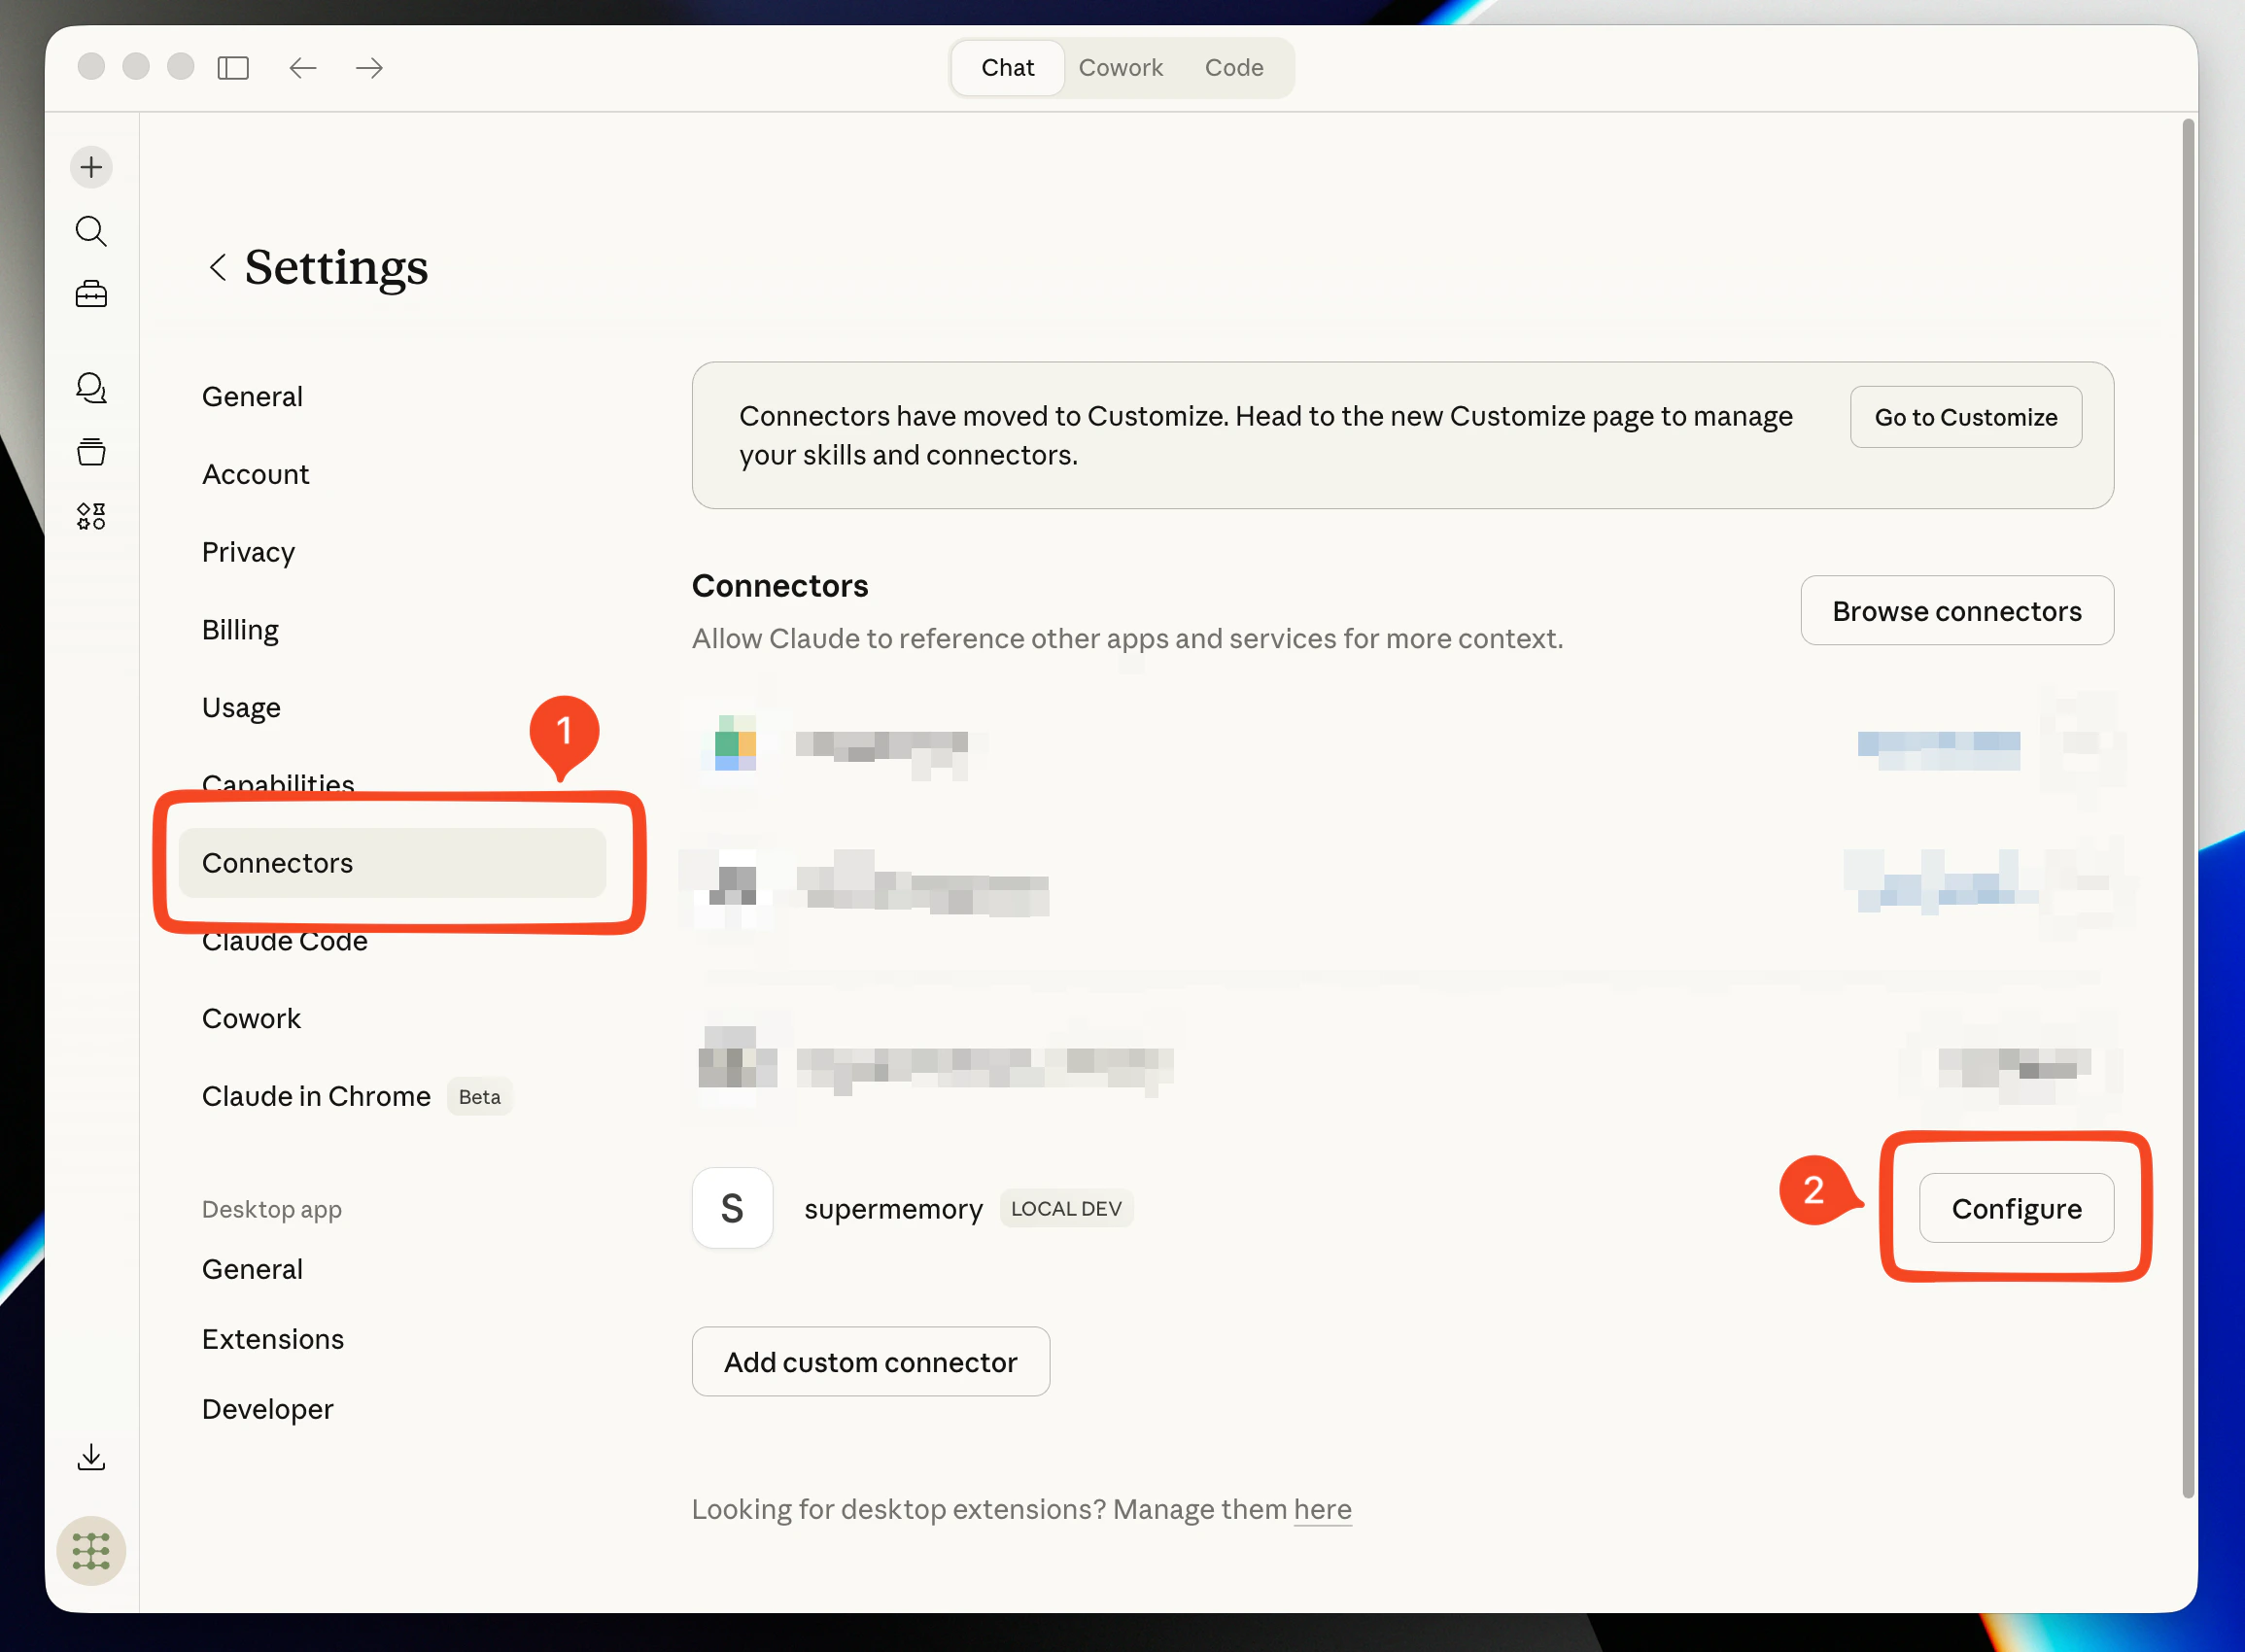
Step 6 — Done
supermemory is installed in your Claude Desktop and ready to use.See also: Overview · Setup and Usage