Building an AI Compliance Chatbot With Supermemory and Google Drive

Contract compliance reviews are a serious drain on time and focus. It’s a repetitive process that takes away from actual legal thinking, and the workflow is absolutely broken.
Files live in different places. You’re never sure if you’re reading the latest version. And no one has time to manually track every obligation, clause, or renewal date buried inside a hundred PDFs.
But what if you had an AI assistant to automatically handle it? One that connects directly to your (or your client’s) Google Drive, stays in sync automatically, and lets you chat with your documents.
In this guide, we’ll walk through building that AI assistant. It connects directly to your Google Drive, keeps itself updated as documents change, and lets you ask questions or run checks over the entire set of contracts without manual uploads or setup.
You’ll use Supermemory to handle document syncing and memory, with a TypeScript backend and a Vite React frontend. You can also access all the code here: GitHub repo
Planning the app
Before jumping into the code, it helps to get clear on what we’re actually building and why. Here’s how I thought through the design:
1. What’s the Assistant Actually Doing?
At a high level, it needs to:
- Connect to a Google Drive and access all relevant legal docs
- Automatically sync new or updated files
- Let the user ask questions about any of the documents
- Respond using context pulled from those files, plus memory of past chats
So the three core jobs are: connect, sync, and chat.
2. Why Supermemory?
Most “chat with your documents” setups require manually uploading files or rebuilding context every time. I wanted something that just stayed in sync without needing to re-upload or reprocess every time someone edits a contract.
Supermemory handles all that for me. It:
- Connects directly to Google Drive
- Watches for file changes and syncs them
- Adds memory and document context automatically to each AI call
That’s huge because I don’t have to manually store, chunk, or retrieve anything.
3. Tools Breakdown
Here’s how I picked the stack:
- Memory + File Syncing: Supermemory handles both, so no need to build my own database or embedding system.
- Chat + AI Responses: OpenAI (GPT-4o) via Supermemory, so memory is already baked into the API call.
- Backend: TypeScript with Express as it’s simple and flexible for API routes.
- Frontend: Vite + React + Tailwind because it’s fast to build and easy to style.
4. Assistant Workflow
Here’s the basic flow this app follows:
- Connect – User clicks a button → initiates Google Drive OAuth via Supermemory
- Sync – After uploading contracts, user clicks sync → Supermemory indexes the new files
- Chat – User sends a message → app hits the /chat API → Supermemory auto-adds document context → GPT-4o generates a useful, formatted reply
That’s the thinking. Now let’s dive right into the code.
Building the app: step-by-step
Project Setup
The first step in the tutorial is to set up our project. First, create a general directory that will house the project's backend and frontend files.
mkdir compliance-checker-assistant
Navigate to the compliance-checker-assistant directory in your terminal to continue with the tutorial.
cd compliance-checker-assistant
Create Assistant Backend
To set up our AI assistant backend. First, add a backend folder to your compliance-checker-assistant folder and navigate to the folder.
mkdir backend
cd backend
Initialize Node in the backend folder.
npm init -y
For the backend, we will be installing the following packages.
- express: To create our backend routes
- dotenv: To pass env variables
- openai: The OpenAI Typescript SDK
- supermemory: Supermemory AI Typescript SDK
Install the required packages with the following command -
npm install express supermemory openai
Install TypeScript and add types for Express.js and Node.
npm install --save-dev typescript @types/node @types/express
Initialize TypeScript:
npx tsc --init
This command will add a tsconfig.json file to your backend folder. Open the tsconfig.json file and add the following code to it:
"outDir": "./dist/",
Add the following scripts to your package.json file.
"scripts": {
   "build": "tsc",
   "start": "node dist/app.js",
   "dev": "ts-node src/app.ts"
 },
Create a .env file and add the following keys and their values to the file.
SUPERMEMORY_API_KEY=
OPENAI_API_KEY=
For instructions on how to retrieve your Supermemory AI api key, see - https://supermemory.ai/docs/model-enhancement/getting-started#get-your-supermemory-api-key
For instructions on how to retrieve your OpenAI api key, see - https://platform.openai.com/api-keys
Create your Assistant server
After setting up our backend, the next step is to create the assistant server. For this tutorial, we will be adding three routes to our backend.
- api/connect - This route will be used to connect to our Google Drive application with Supermemory AI. This will enable Supermemory AI to access the contract and compliance files stored in the drive.
- api/sync - This route will be used to sync Supermemory AI and our Google Drive. This is useful when we add new files to our drive and we need to keep our Supermemory files up to date.
- api/chat - This route will be used to chat with our AI assistant.
Add a src folder to your backend folder, and add an app.ts file to the folder.
mkdir src
touch app.ts
Add the following code sample to the app.ts file
import express from "express";
import "dotenv/config";
import chatRoutes from "./routes/chatRoutes";

const app = express();
const PORT = 3100;

app.use(express.json());

app.use("/api", chatRoutes);

app.listen(PORT, () => {
 console.log(`Server running on http://localhost:${PORT}`);
});
In this code, we created our backend server using Express.js. We imported our .env file parameters using dotenv, imported our routes, and configured our server to listen on port 3100.
To create the required routes, add a routes folder to your src folder and add a chatRoutes.ts file to the folder.
mkdir routes
touch routes/chatRoutes.ts
Add the following code to the chatRoutes.ts file
import express, {
 Request,
 Response,
 NextFunction,
 RequestHandler,
} from "express";
import Supermemory from "supermemory";
import OpenAI from "openai";
const router = express.Router();
const client = new Supermemory({
 apiKey: process.env["SUPERMEMORY_API_KEY"], // This is the default and can be omitted
});

const openai = new OpenAI({
 apiKey: process.env.OPENAI_API_KEY,
 baseURL: "https://api.supermemory.ai/v3/https://api.openai.com/v1",
 defaultHeaders: {
   "x-api-key": process.env.SUPERMEMORY_API_KEY,
 },
});
In this code, we created an Express router, initialized a Supermemory client, and an OpenAI client. Note the OpenAI baseUrl and default headers; with this configuration, Supermemory automatically appends relevant memory and context to our conversation when interacting with OpenAI APIs.
Add the following code to the chatRoutes.ts file to create the api/connect route -
router.get("/connect", async (req: Request, res: Response) => {
 try {
   const connection = await client.connections.create("google-drive", {
     redirectUrl: "http://localhost:5173",
   });
   res.status(201).json({
     message: "authenticate",
     url: connection.authLink,
   });
 } catch (error) {
   console.error("Connection creation failed:", error);
   res.status(500).json({
     message: "Failed to initiate connection",
     error: (error as Error).message,
   });
 }
});
First, we created a new Google Drive connection using the Suprememory SDK. An authentication link is then collected from the response and sent back as a response for the API.
Note that we added a redirectUrl parameter to the request. The authentication link will redirect to the redirect URL after the authentication process is completed.
Add the following code to the chatRoutes.ts file to create the api/sync route -
router.get("/sync", async (req: Request, res: Response) => {
 try {
   await client.connections.import("google-drive");
   res.status(201).json({
     message: "synced",
   });
 } catch (error) {
   console.error("Sync failed:", error);
   res.status(500).json({
     message: "Failed to initiate sync",
     error: (error as Error).message,
   });
 }
});
This code performs a connection sync between Supermemory and Google Drive. After completing the sync, the api returns a `synced` response.
Add the following code to the chatRoutes.ts file to create the api/chat route -
interface ChatRequestBody {
 message: string;
}
interface ChatResponse {
 response: string | null;
}
interface ErrorResponse {
 error: string;
}

const chatHandler: RequestHandler<
 {},
 ChatResponse | ErrorResponse,
 ChatRequestBody
> = async (req, res, next) => {
 const { message } = req.body;
 if (!message) {
   res
     .status(400)
     .json({ error: 'Request body must include a "message" field.' });
   return;
 }

 try {
   const completion = await openai.chat.completions.create({
     model: "gpt-4o",
     user: "sheriff",
     messages: [
       {
         role: "system",
         content:
           "You are ContractGuard, an AI assistant for contract and compliance reviews. When given any contract text, you will:\n\n1. Highlight key obligations and risks.\n2. Point out missing or non-standard clauses.\n3. Recommend fixes or best-practice language.\n4. Always format your answer in Markdown with headings and bullet points.",
       },
       { role: "user", content: message },
     ],
   });

   res.status(200).json({
     response: completion.choices[0].message.content,
   });
   return;
 } catch (err) {
   console.error("Chat failed:", err);
   res.status(500).json({ error: "Failed to initiate AI chat." });
   return;
 }
};

router.post("/chat", chatHandler);
The `chatHandler` function first extracts the user’s message from the request body. It then passes the system our AI assistant system's prompt and the extracted user message to the OpenAI SDK to get a response.
Note that we are not adding our previous conversation manually to the messages; this is handled automatically by Supermemory. In addition to that, Supermemory also handles the AI’s interaction with your Google Drive files.
Add the following to the end of the chatRoutes.ts file to export your routes.
export default router;Start your backend server with the following command.
npm run build
npm run start
You can access your backend server at http://localhost:3100.
Create your app’s frontend
After completing the assistant's backend, the next step is to create a chat interface frontend for the assistant. We will be using Vite React, TypeScript, and Tailwind CSS for our frontend code.
Create a Vite React TypeScript project named frontend.
npm create vite@latest frontend -- --template react-tsNavigate to the project and install the required dependencies
cd frontend
npm install
Install Tailwind CSS Vite
npm install tailwindcss @tailwindcss/viteOpen your vite.config.ts and update it to the following code.
import tailwindcss from '@tailwindcss/vite'
import react from '@vitejs/plugin-react'

// https://vite.dev/config/
export default defineConfig({
 plugins: [react(), tailwindcss()],
 })
Open your src/index.css file and import Tailwind CSS at the top of the file
@import "tailwindcss";Start your frontend server.
npm run devYou should be able to access your app at http://localhost:5173/.
The next step is to implement the chat interface, open your App.tsx file, and replace the code with the following code.
Let’s start with the necessary imports:
import type React from 'react'

import { useState, useRef, useEffect } from 'react'
import ReactMarkdown from 'react-markdown'
import { Send, Bot, User, Loader2 } from 'lucide-react'
At the top of the file, we’ll now define TypeScript interfaces for our chat messages and API responses:
interface Message {
 id: string
 role: 'user' | 'assistant'
 content: string
 timestamp: Date
}

interface ConnectResponse {
 message: string;
 url?: string;
 error?: string;
}

interface SyncResponse {
 message: string;
 error?: string;
}
Since this project is built with TypeScript, defining interfaces upfront helps make the entire frontend codebase easier to reason about and catch bugs early. We only define a few interfaces here, but they’re essential to how the chat system operates.
The Message interface represents a single message in the conversation. It includes an id (used as a unique key when rendering messages), a role (either user or assistant so we can style them differently), the content (which is the actual message text), and a timestamp.
Every time a user sends a message or the assistant replies, we create a new Message object and add it to our state.
The ConnectResponse and SyncResponse types are used to type-check the data we get back from the backend API when connecting to Google Drive or syncing files to avoid runtime errors.
Now, let’s set up the states and refs:
function App () {
 const [messages, setMessages] = useState<Message[]>([])
 const [input, setInput] = useState('')
 const [isLoading, setIsLoading] = useState(false)
 const messagesEndRef = useRef<HTMLDivElement>(null)
messages is the core of the chat experience. It’s an array that holds every message in the order they were sent.
input stores whatever the user is currently typing. As the user types in the input box, this gets updated in real-time.
isLoading is a simple flag to tell us when the assistant is “thinking.”
It’s used to disable the input field and show a spinner in the chat UI so users don’t accidentally submit multiple messages or get confused by lag.
messagesRef is a reference to an invisible div at the bottom of the chat window. We use this to automatically scroll the chat down to the latest message every time a new one is added.
Next, we’ll write functions to connect to Google Drive and Sync the content, sending requests to our backend APIs:
const handleConnect = async () => {
   try {
     const res = await fetch('http://localhost:3100/api/connect', {
       method: 'GET',
       credentials: 'include',
     });
     const data: ConnectResponse = await res.json();

     if (!res.ok) {
       console.log(data.error ?? data.message);
     } else if (data.url) {
       // redirect to the OAuth URL
       window.location.href = data.url;
     }
   } catch (err) {
     console.log((err as Error).message);
   }
 };

 const handleSync = async () => {
   try {
     const res = await fetch('http://localhost:3100/api/sync', {
       method: 'GET',
       credentials: 'include',
     });
     const data: SyncResponse = await res.json();

     if (!res.ok) {
       console.log(data.error ?? data.message);
     } else {
       console.log(data.message);
     }
   } catch (err) {
     console.log((err as Error).message);
   }
 };
The handleConnect function makes a GET request to our backend route at /api/connect, it gets the authLink returned from the backend, and redirects the user to it. This is how the user grants permissions to Supermemory to read our GDrive files.
The handleSync function explicitly tells Supermemory to sync to Google Drive. Supermemory automatically does it whenever a new doc is uploaded, but in case you need manual refreshing, this function will work.
It also sends a GET request to our backend /api/sync endpoint and when it’s successfully done, we log a simple confirmation message {message: ‘synced’} in the console.
Now, let’s handle the main logic of sending messages and receiving responses:
 const scrollToBottom = () => {
   messagesEndRef.current?.scrollIntoView({ behavior: 'smooth' })
 }

 useEffect(() => {
   scrollToBottom()
 }, [messages])
The scrollToBottom function is a little helper that scrolls automatically down when a new message loads.
Now, the chatHandler is the main function that encompasses the logic of our app:
const chatHandler: RequestHandler<{}, ChatResponse | ErrorResponse, ChatRequestBody> = async (req, res) => {
 const { message } = req.body;
 if (!message) {
   res.status(400).json({ error: 'Request body must include a "message" field.' });
   return;
 }

 try {
   // Initial response: model decides if it should use the search tool
   const initial = await openai.responses.create({
     model: "gpt-4o",
     instructions: `You are ContractGuard, an assistant for contract and compliance reviews.
Decide if you need to search documents to answer the user's question.
If yes, call the 'supermemory_search' tool with the query parameter.
Otherwise, provide an answer directly.`,
     input: message,
     tools: [
       {
         type: "function",
         name: "supermemory_search",
         description: "Search documents in Google Drive",
         strict: true,
         parameters: {
           type: "object",
           properties: {
             query: {
               type: "string",
               description: "The search query for finding relevant documents"
             },
           },
           required: ["query"],
           additionalProperties: false,
         },
       },
     ],
     tool_choice: "auto",
   });

   // Check if there's a function call in the output
   const functionCall = initial.output.find(item => item.type === "function_call");

   if (functionCall && functionCall.name === "supermemory_search") {
     const args = JSON.parse(functionCall.arguments || "{}");

            // Perform the search using supermemory client
      let docs;
      try {
        // Use the correct Supermemory API method
        docs = await client.search.execute({
          q: args.query,
          limit: 5
        });

        console.log(`🔍 Search executed: "${args.query}"`);
      } catch (searchError) {
        console.error("Supermemory search failed:", searchError);
        res.status(500).json({ error: "Failed to search documents. Please try again." });
        return;
      }

     // Second response: provide search results for final answer
     const followUp = await openai.responses.create({
       model: "gpt-4o",
       instructions: `You are ContractGuard. Use the provided search results to answer the user's question about contracts and compliance.
Be specific and cite relevant information from the documents when possible.`,
       input: [
         {
           type: "function_call",
           call_id: functionCall.call_id,
           name: functionCall.name,
           arguments: functionCall.arguments,
         },
         {
           type: "function_call_output",
           call_id: functionCall.call_id,
           output: JSON.stringify(docs),
         },
         {
           role: "user",
           content: message,
         }
       ],
     });

     res.status(200).json({
       response: followUp.output_text || "I found some documents but couldn't generate a response. Please try rephrasing your question."
     });
     return;
   }

   // No tool call needed: return the direct answer
   res.status(200).json({
     response: initial.output_text || "I'm ready to help with contract and compliance questions. Please ask me anything!"
   });
   return;

 } catch (err) {
   console.error("Chat handler error:", err);
   res.status(500).json({
     error: "An error occurred while processing your request. Please try again."
   });
   return;
 }
};
First, as soon as a request hits ‘/chat’, we pul message out of the JSON body. If it’s missing, we return a 400 error. Then, we use OpenAI’s Responses API with three key pieces:
instructionsthat tell the model it’s ContractGuard and should decide whether it needs to search the Drive documents.- A single tool definition named ‘supermemory_search’, which strictly accepts an object with a
querystring. tool_choice: “auto”, so the model can either answer directly or invoke our search tool.
At this point, the model returns a sequence of output items, which may include a function_call if it thinks a search is required. If there’s a function called supermemory_search in the output, it means the model wants us to run a document search.
So, we use Supermemory’s .search.execute() method, we run that query against the user’s connected Drive docs, limiting the results to the top 5.
Then, we hit the Responses API again, with the original function_call object, the search results, and the user’s original message.
Lastly, we have a simple utility to wipe the entire chat history.
const clearChat = () => { setMessages([]) }
We’ve also created the UI for the app below and linked the functions to distinct buttons:
 return (
   <div className='flex flex-col h-screen w-screen bg-gray-50'>
     {/* Header */}
     <header className='bg-white shadow-sm border-b px-4 py-3'>
       <div className='max-w-4xl mx-auto flex items-center justify-between'>
         <h1 className='text-xl font-semibold text-gray-800 flex items-center gap-2'>
         ContractGuard
         </h1>
         <div className='flex items-center gap-2'>
           <button
             onClick={handleConnect}
             className='px-3 py-1 text-sm bg-gray-100 hover:bg-gray-200 rounded-md transition-colors'
           >
             Connect to Google Drive
           </button>

           <button
             onClick={handleSync}
             className='px-3 py-1 text-sm bg-gray-100 hover:bg-gray-200 rounded-md transition-colors'
           >
             Sync Google Drive
           </button>
           <button
             onClick={clearChat}
             className='px-3 py-1 text-sm bg-gray-100 hover:bg-gray-200 rounded-md transition-colors'
           >
             Clear chats
           </button>
         </div>
       </div>
     </header>

     {/* Messages */}
     <div className='flex-1 overflow-y-auto px-4 py-6'>
       <div className='max-w-4xl mx-auto space-y-6'>
         {messages.length === 0 && (
           <div className='text-center text-gray-500 py-12'>
             <Bot className='w-12 h-12 mx-auto mb-4 text-gray-300' />
             <p className='text-lg'>Start a conversation with the AI</p>
             <p className='text-sm'>Type your message below to get started</p>
           </div>
         )}

         {messages.map(message => (
           <div
             key={message.id}
             className={`flex gap-3 ${
               message.role === 'user' ? 'justify-end' : 'justify-start'
             }`}
           >
             {message.role === 'assistant' && (
               <div className='flex-shrink-0'>
                 <div className='w-8 h-8 bg-blue-600 rounded-full flex items-center justify-center'>
                   <Bot className='w-4 h-4 text-white' />
                 </div>
               </div>
             )}

             <div
               className={`max-w-3xl rounded-lg px-4 py-3 ${
                 message.role === 'user'
                   ? 'bg-blue-600 text-white'
                   : 'bg-white border border-gray-200'
               }`}
             >
               {message.role === 'user' ? (
                 <p className='whitespace-pre-wrap'>{message.content}</p>
               ) : (
                 <div className='prose prose-sm max-w-none text-black'>
                   <ReactMarkdown
                     components={{
                       code ({ inline, className, children, ...props }) {
                         if (inline) {
                           return (
                             <code
                               className='bg-gray-100 px-1 py-0.5 rounded text-sm'
                               {...props}
                             >
                               {children}
                             </code>
                           )
                         }
                         return (
                           <pre className='bg-gray-100 rounded-lg p-4 overflow-x-auto text-sm'>
                             <code className={className} {...props}>
                               {children}
                             </code>
                           </pre>
                         )
                       }
                     }}
                   >
                     {message.content}
                   </ReactMarkdown>
                 </div>
               )}
               <div className='text-xs opacity-70 mt-2'>
                 {message.timestamp.toLocaleTimeString()}
               </div>
             </div>

             {message.role === 'user' && (
               <div className='flex-shrink-0'>
                 <div className='w-8 h-8 bg-gray-600 rounded-full flex items-center justify-center'>
                   <User className='w-4 h-4 text-white' />
                 </div>
               </div>
             )}
           </div>
         ))}

         {isLoading && (
           <div className='flex gap-3 justify-start'>
             <div className='flex-shrink-0'>
               <div className='w-8 h-8 bg-blue-600 rounded-full flex items-center justify-center'>
                 <Bot className='w-4 h-4 text-white' />
               </div>
             </div>
             <div className='bg-white border border-gray-200 rounded-lg px-4 py-3'>
               <div className='flex items-center gap-2 text-gray-500'>
                 <Loader2 className='w-4 h-4 animate-spin' />
                 <span>AI is thinking...</span>
               </div>
             </div>
           </div>
         )}

         <div ref={messagesEndRef} />
       </div>
     </div>

     {/* Input */}
     <div className='bg-white border-t px-4 py-4 text-black'>
       <div className='max-w-4xl mx-auto'>
         <form onSubmit={sendMessage} className='flex gap-3'>
           <input
             type='text'
             value={input}
             onChange={e => setInput(e.target.value)}
             placeholder='Type your message...'
             disabled={isLoading}
             className='flex-1 px-4 py-3 border border-gray-300 rounded-lg focus:outline-none focus:ring-2 focus:ring-blue-500 focus:border-transparent disabled:opacity-50'
           />
           <button
             type='submit'
             disabled={!input.trim() || isLoading}
             className='px-6 py-3 bg-blue-600 text-white rounded-lg hover:bg-blue-700 focus:outline-none focus:ring-2 focus:ring-blue-500 focus:ring-offset-2 disabled:opacity-50 disabled:cursor-not-allowed transition-colors flex items-center gap-2'
           >
             {isLoading ? (
               <Loader2 className='w-4 h-4 animate-spin' />
             ) : (
               <Send className='w-4 h-4' />
             )}
             Send
           </button>
         </form>
       </div>
     </div>
   </div>
 )
}

export default App
This code implements a connect button, sync button, and a chat interface. Your frontend app should change to the following.
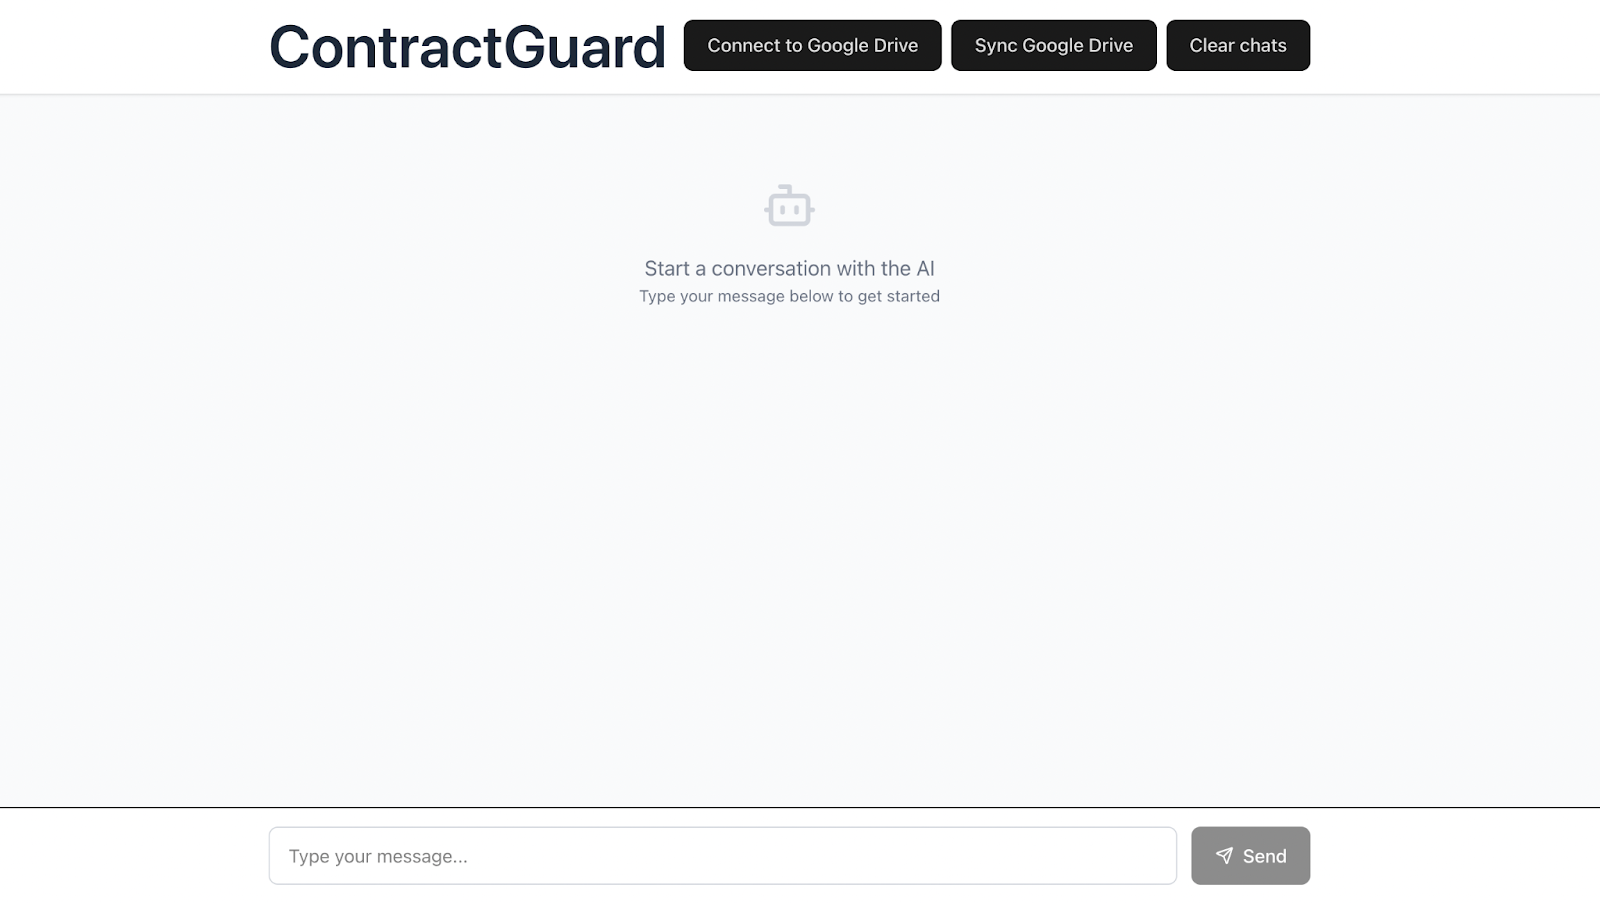
Chat with your assistant
To chat with your AI assistant, first, click Connect to Google Drive, you will be redirected to an OAuth URL to complete your authorization process that wil grant Supermemory access to files in your Google Drive, then upload your Contract and Compliance files to your google drive and click Sync Google Drive to bring Supermemory AI up to date with the new files.
Ask a question to your AI via the chat interface, Supermemory will automatically insert context from the contract and compliance files stored in your Google Drive and your previous conversations with the AI into the AI chat, helping your AI give you the correct answers.
Conclusion
And that’s a wrap. You now have a contract compliance chatbot that:
- Connects itself straight to Google Drive without any manual uploads
- Automatically keeps its document “memory” up to date
- Decides when to dig into your contracts and brings back precise, cited answers
By leaning on Supermemory as your memory layer, you never have to build complex ingestion pipelines or worry about stitching context back into your prompts. Supermemory handles the Drive sync, the embedding, and the context injection so you can focus on tweaking your assistant’s prompts, refining its compliance checks, and rolling it out to real users.
Head over to supermemory.ai and grab your API key now, it’s free.