> ## Documentation Index
> Fetch the complete documentation index at: https://supermemory.ai/docs/llms.txt
> Use this file to discover all available pages before exploring further.
# Claude Desktop
> Manual setup for supermemory MCP in Claude Desktop with step-by-step screenshots
This guide walks through the **manual** install for [Claude Desktop](https://claude.ai/download): edit `claude_desktop_config.json`, add the supermemory server, then finish in **Connectors**. For a one-line CLI install instead, see [Setup and Usage](/supermemory-mcp/setup).
Config file location: **macOS** `~/Library/Application Support/Claude/claude_desktop_config.json` · **Windows** `%APPDATA%\Claude\claude_desktop_config.json`
## Step 1 — Copy the configuration
Copy the supermemory block below. You will paste it inside `mcpServers` in a later step.
```json theme={null}
{
"mcpServers": {
"supermemory": {
"command": "npx",
"args": [
"-y",
"mcp-remote@latest",
"https://mcp.supermemory.ai/mcp"
]
}
}
}
```
This is the same configuration shown in the supermemory dashboard when you choose **Claude Desktop** for MCP setup.
## Step 2 — Open Developer settings and Edit Config
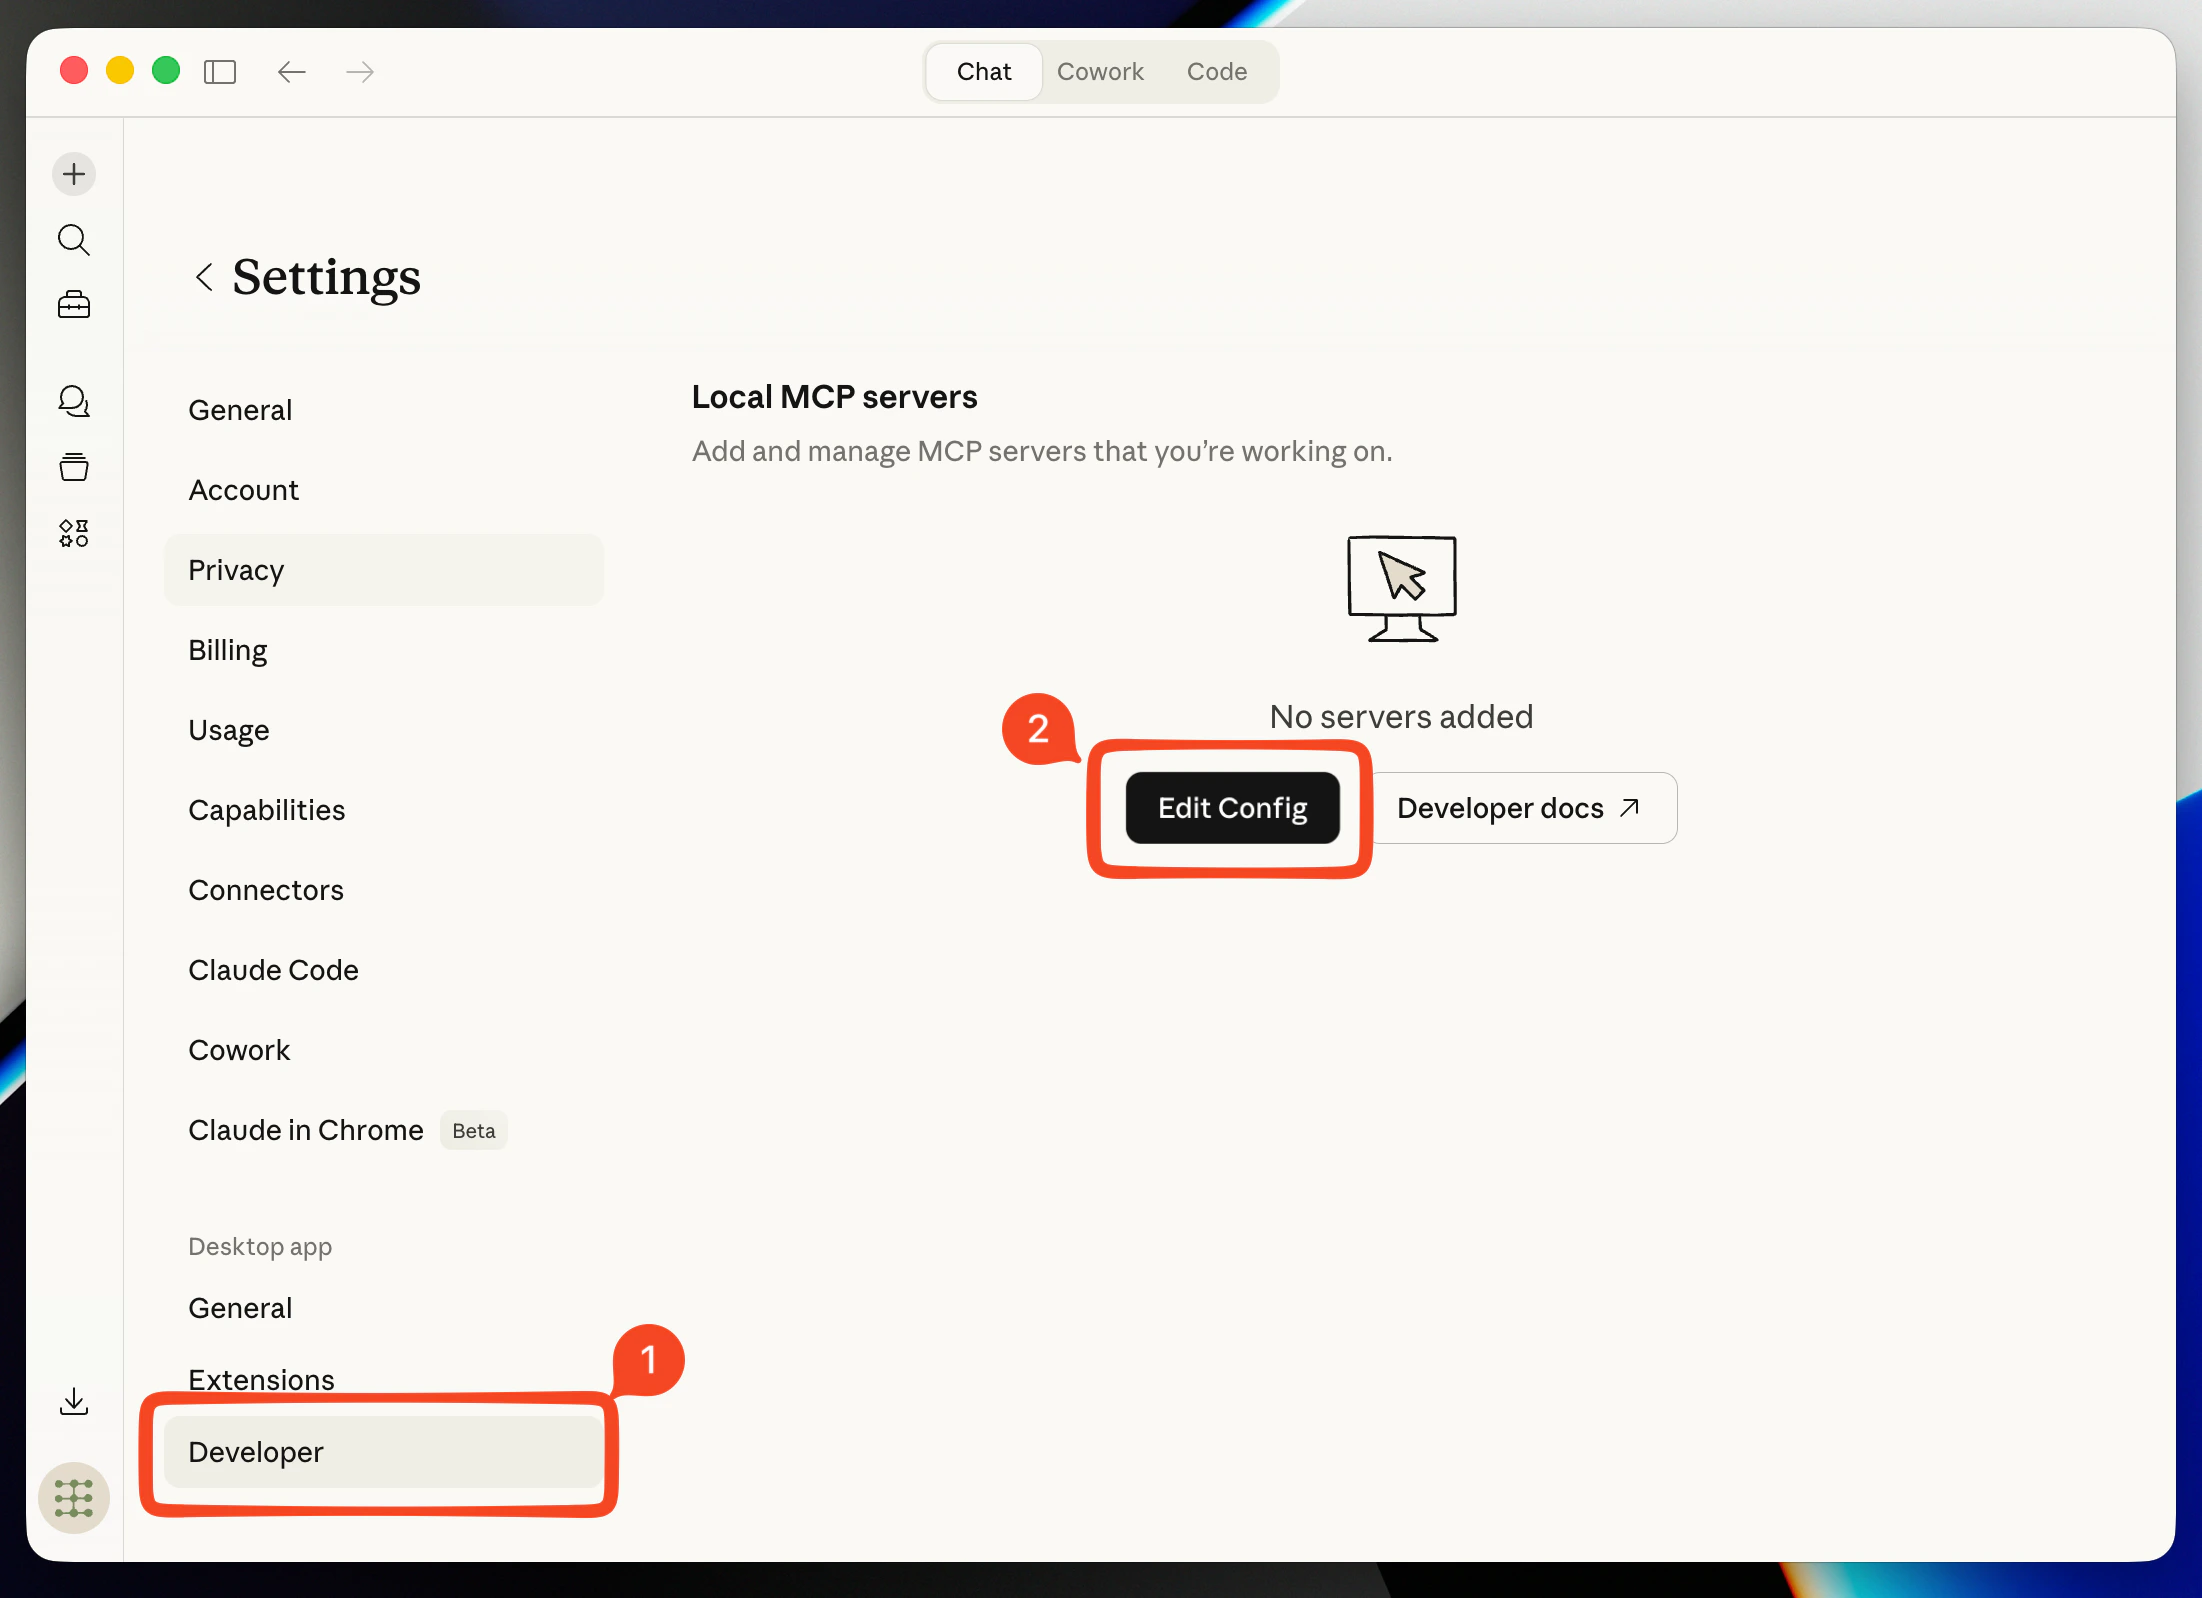
In Claude Desktop, open **Settings → Developer**, then click **Edit Config**.
 ## Step 3 — Open claude\_desktop\_config.json
When `claude_desktop_config.json` opens in your editor, keep it ready for the next step.
## Step 3 — Open claude\_desktop\_config.json
When `claude_desktop_config.json` opens in your editor, keep it ready for the next step.
 ## Step 4 — Paste under mcpServers and save
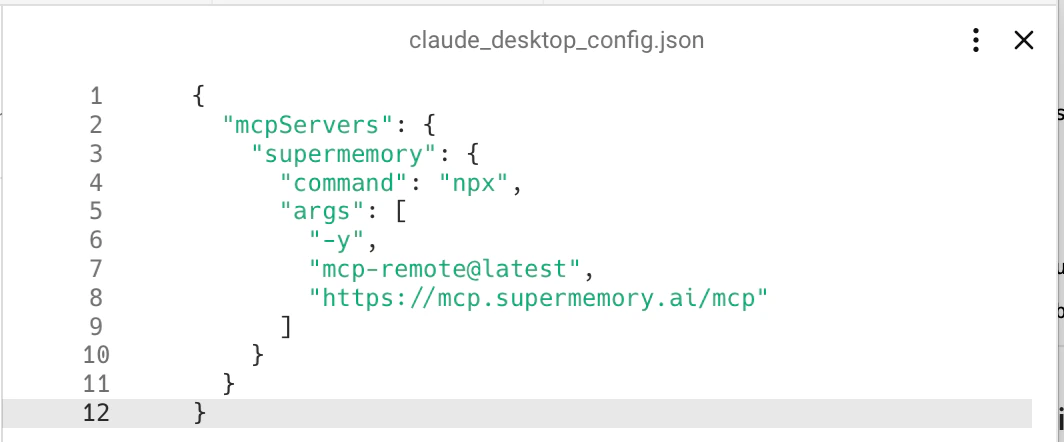
Paste what you copied under `mcpServers` (merge with existing servers if the file already has some), then save.
## Step 4 — Paste under mcpServers and save
Paste what you copied under `mcpServers` (merge with existing servers if the file already has some), then save.
 ## Step 5 — Restart and configure in Connectors
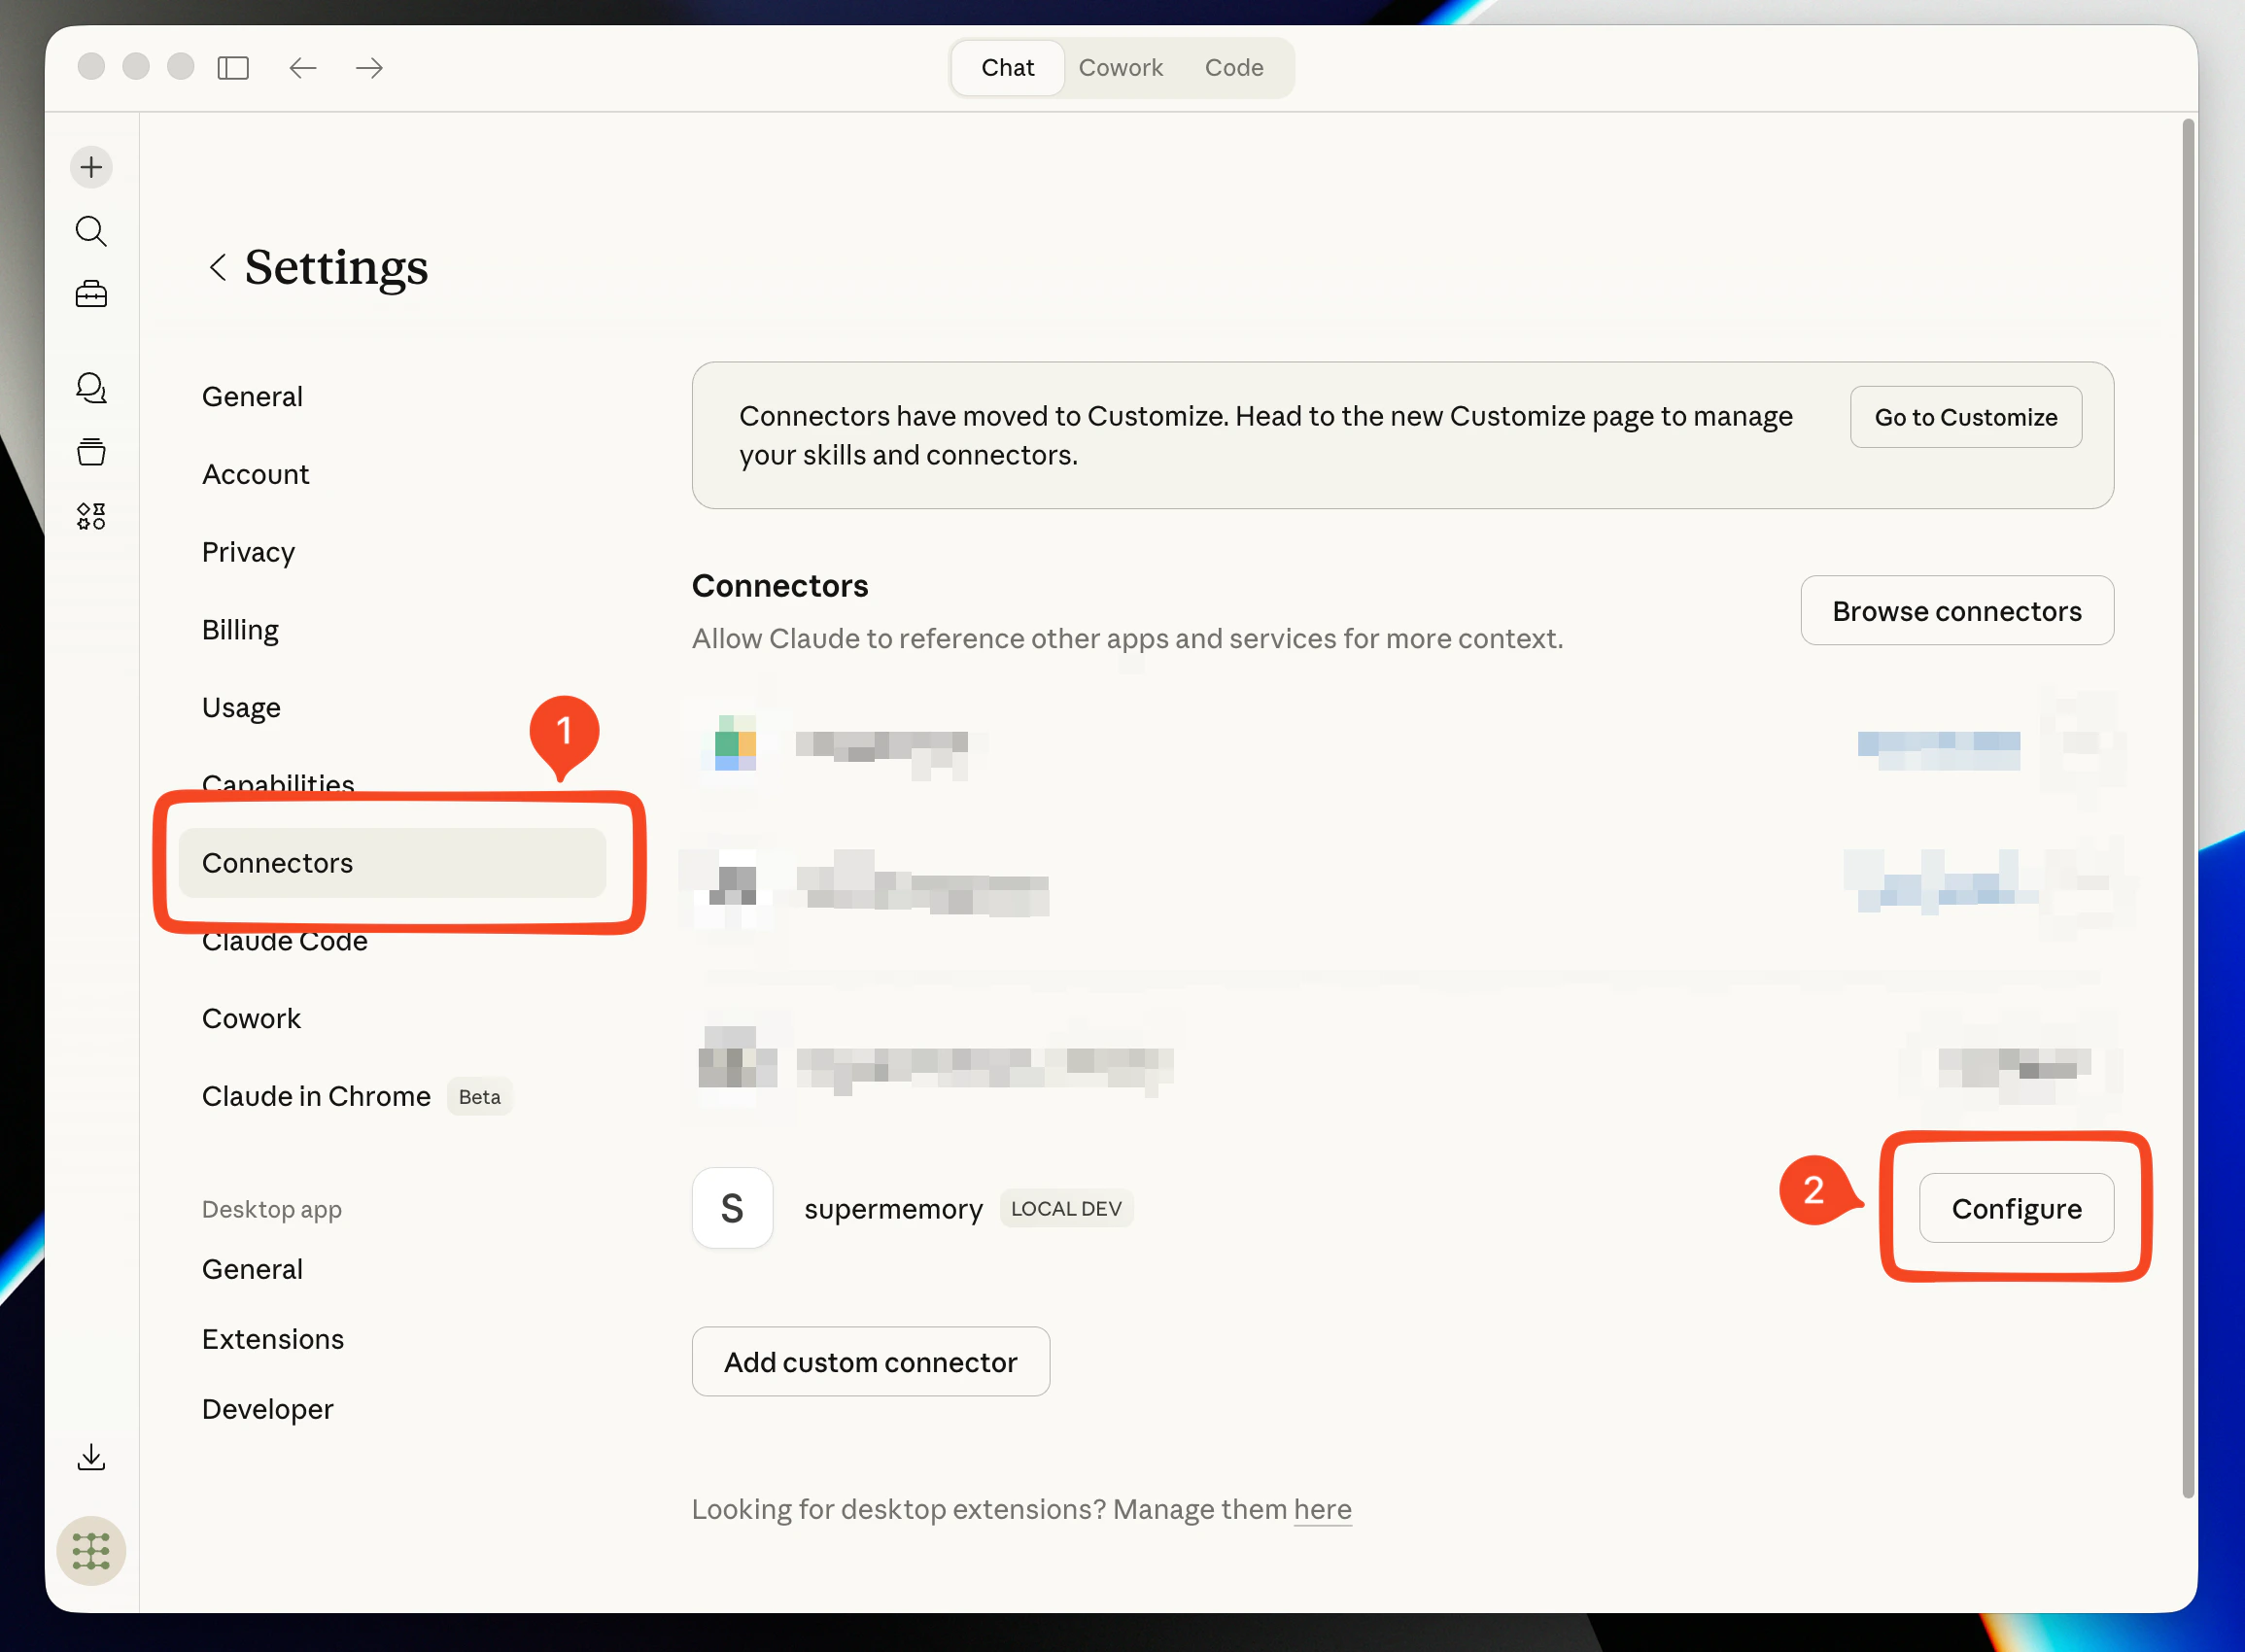
Restart Claude Desktop. Open **Settings → Connectors**, find **supermemory**, and click **Configure**.
## Step 5 — Restart and configure in Connectors
Restart Claude Desktop. Open **Settings → Connectors**, find **supermemory**, and click **Configure**.
 ## Step 6 — Done
supermemory is installed in your Claude Desktop and ready to use.
***
**See also:** [Overview](/supermemory-mcp/mcp) · [Setup and Usage](/supermemory-mcp/setup)
## Step 6 — Done
supermemory is installed in your Claude Desktop and ready to use.
***
**See also:** [Overview](/supermemory-mcp/mcp) · [Setup and Usage](/supermemory-mcp/setup)